
Make A Witch Hat Out of Popsicle Sticks
Make a unique witch hat for Halloween with this popsicle stick craft idea for kids. Find step-by-step instructions on how to make adorable-looking witch hats.

Halloween is just around the corner. And are you ready to get crafty? I sure am. These adorable Witch Hats are an easy DIY project you can use for parties or decor! They will put you into the Halloween spirit.
I love completing crafts that can be used in your home as display pieces. The other great thing about these, your children’s artwork is a useful and fun creation. Well, without further delay, let’s get this crafting party started. Que Halloween music!
How to Make A Witch Hat Out of Popsicle Sticks
Supplies Needed
Please note that you can also print the instructions for this craft. Just scroll down.
- Large craft sticks
- Small craft sticks
- Black paint
- Orange paint
- Spiderweb scrapbook paper (This Scrapbook Pape Whaline is the BEST)
- Orange ribbon
- Plastic spiders
- Glue (Hot glue or school glue – the choice is up to you)
How To Make A Popsicle Stick Witch Hat Craft
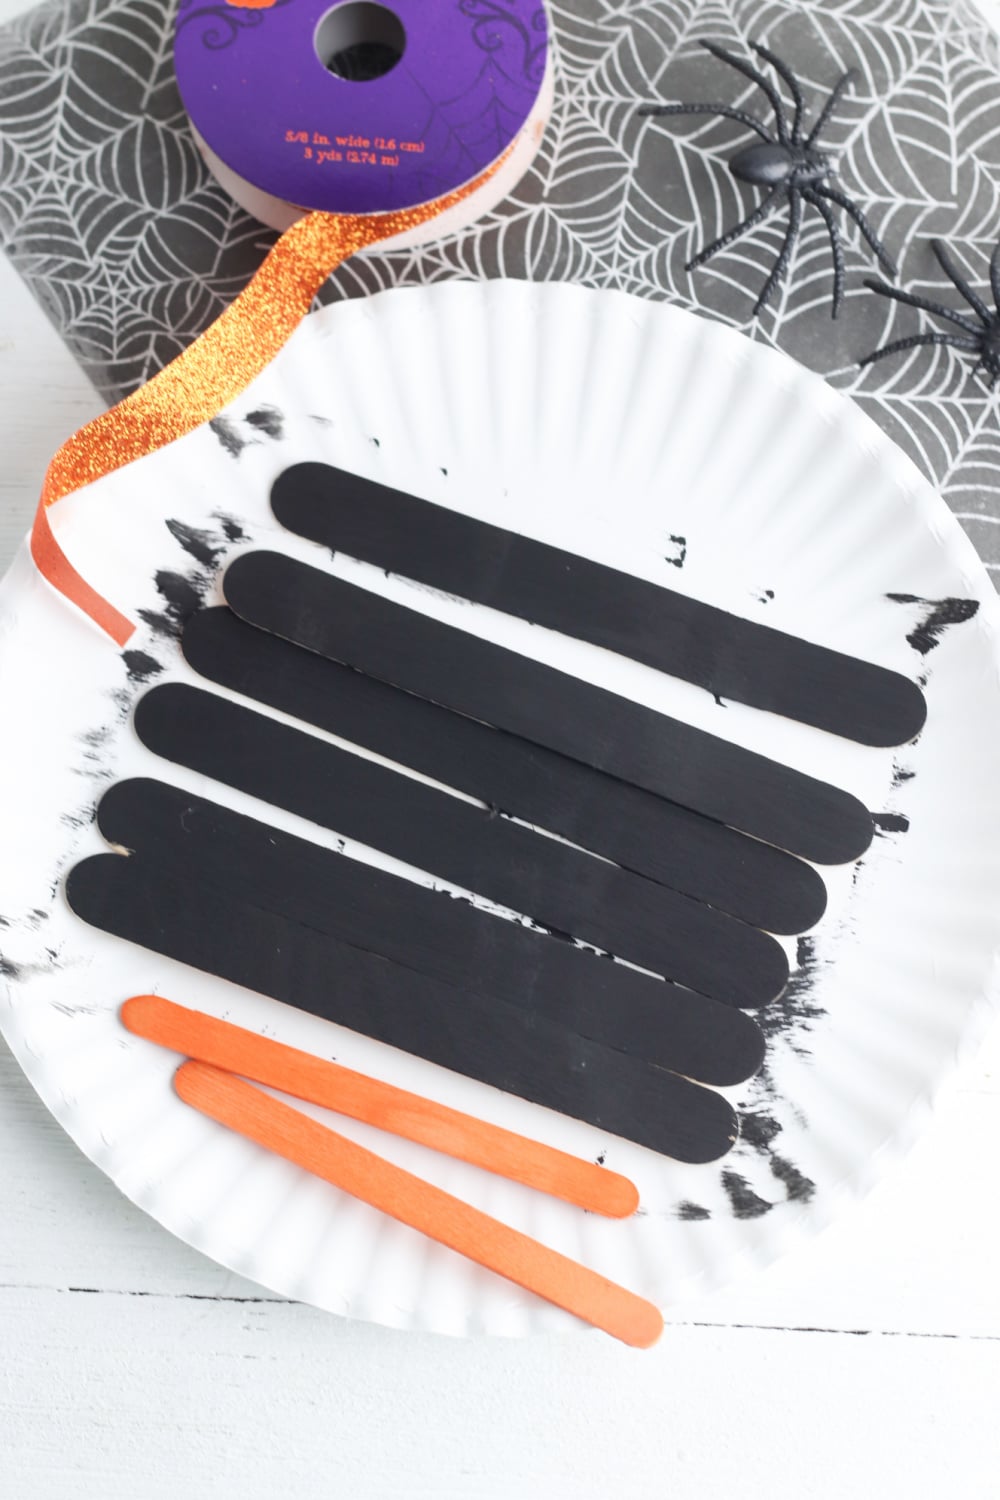
Start by painting the larger craft sticks black. Once they are all set, work on painting the smaller ones orange. Now it is your choice to paint the backsides. We didn’t, as no one will see them. But that option is available.
Before beginning the next step, it is important to make sure that your craft sticks are completely dry. Our hats took about 30 minutes. If they are wet and you glue them together using craft glue, your color will run.
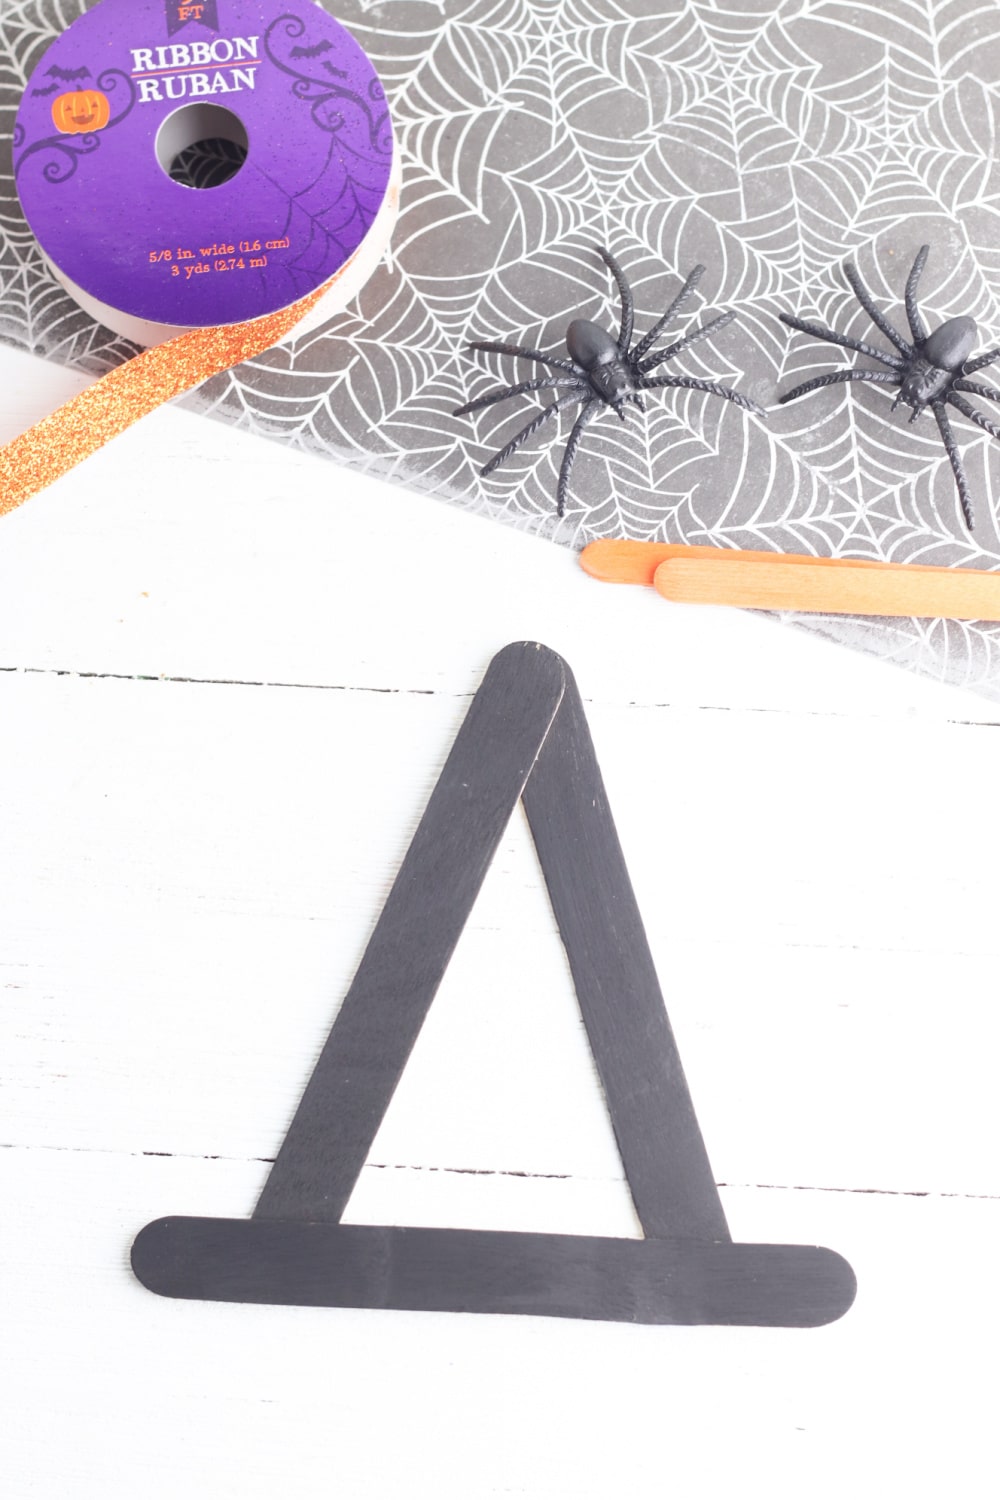
This next step is pretty simple. Take your three black craft sticks and glue them onto the form of a witch’s hat. See the picture above as I placed the stick more towards the center than the furthest point.
You don’t want a full triangle.
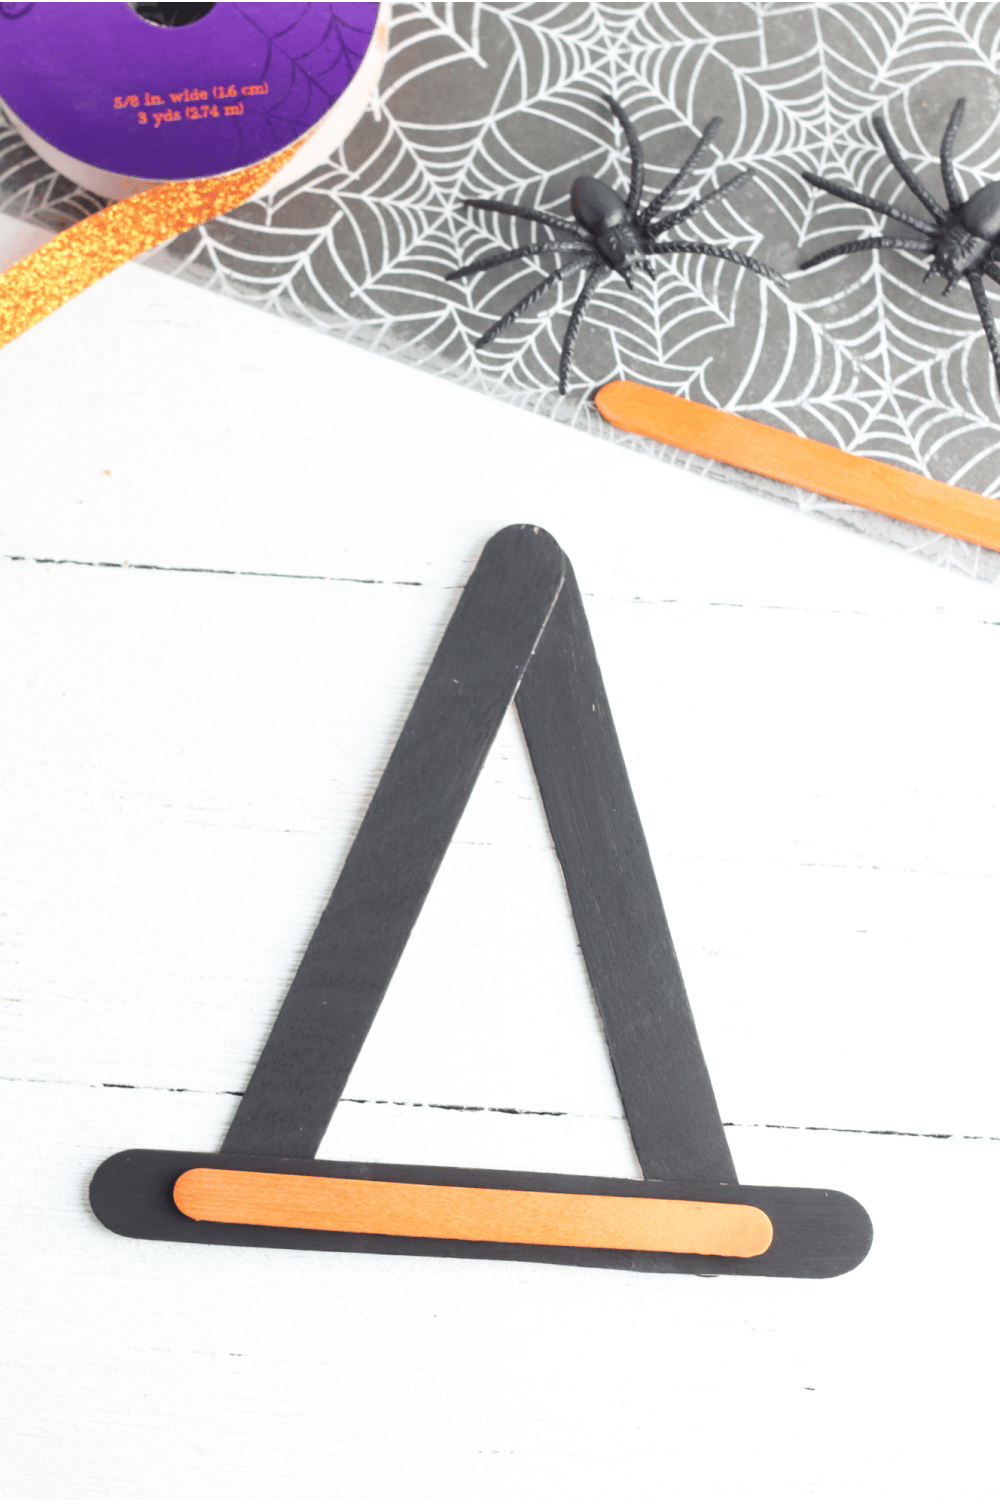
Now you are set to add in one of the orange craft sticks as your hat brim embellishment. This little piece will make your hat stand out. You could even consider painting it a bright purple.
Now is the time to wait for the frame of your hat to dry.
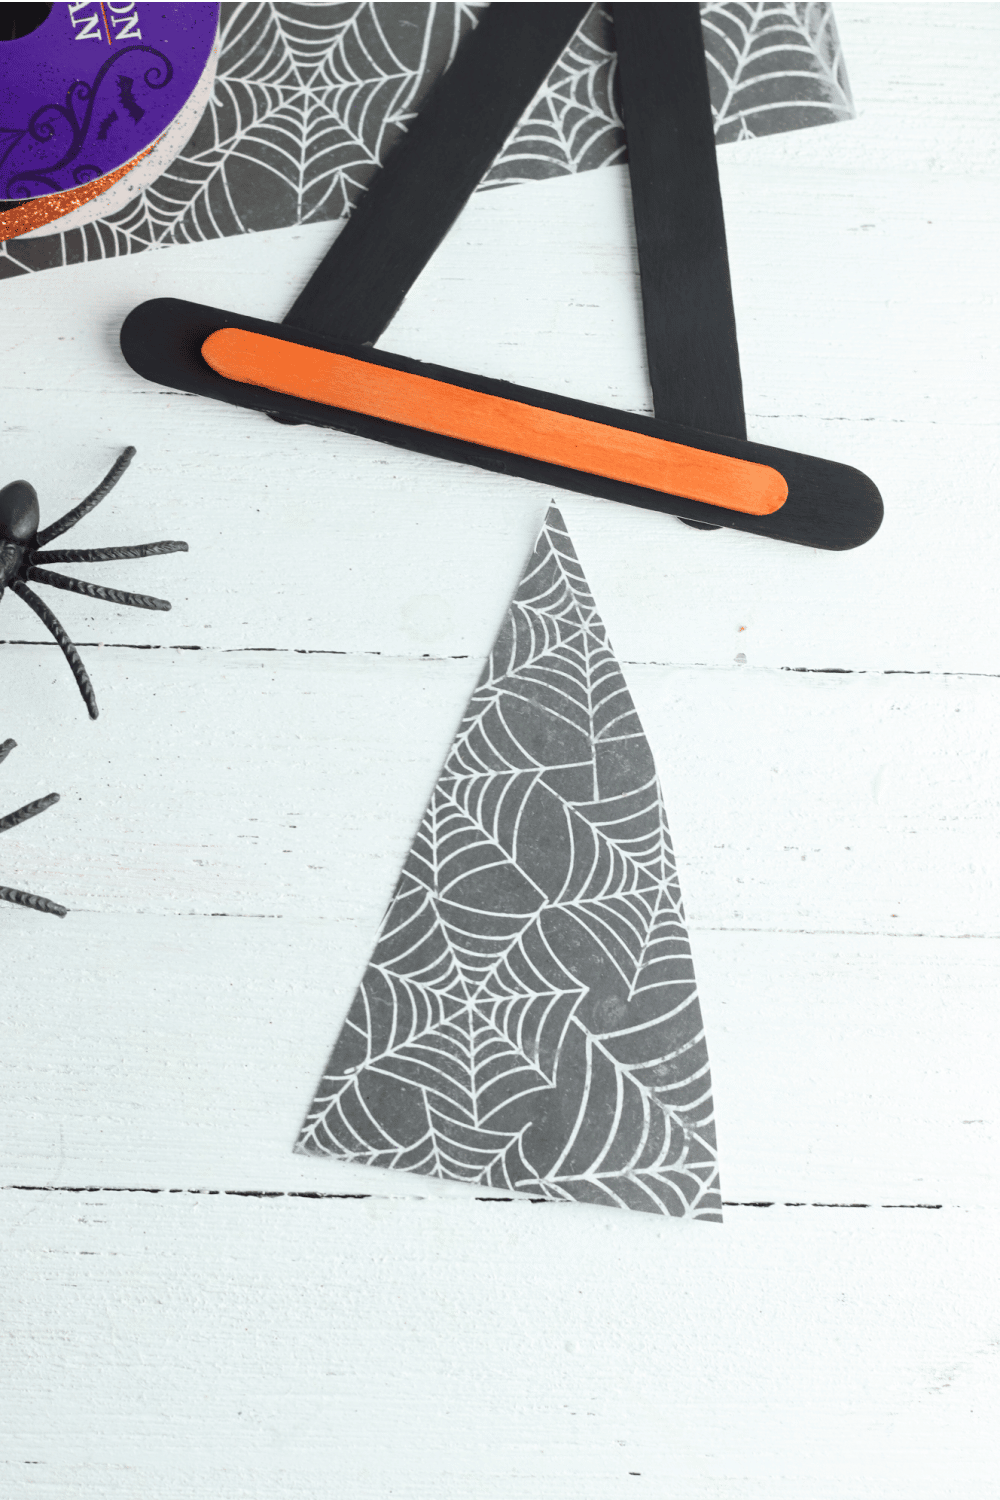
As your frame to your hat is drying, now is a good time to start working on the inside desire of your hat.
First, choose your favorite pattern from your scrapbook paper stash. Then cut the paper into a triangle, making sure that it is slightly larger than your hat opening, and glue it to the back of the hat.
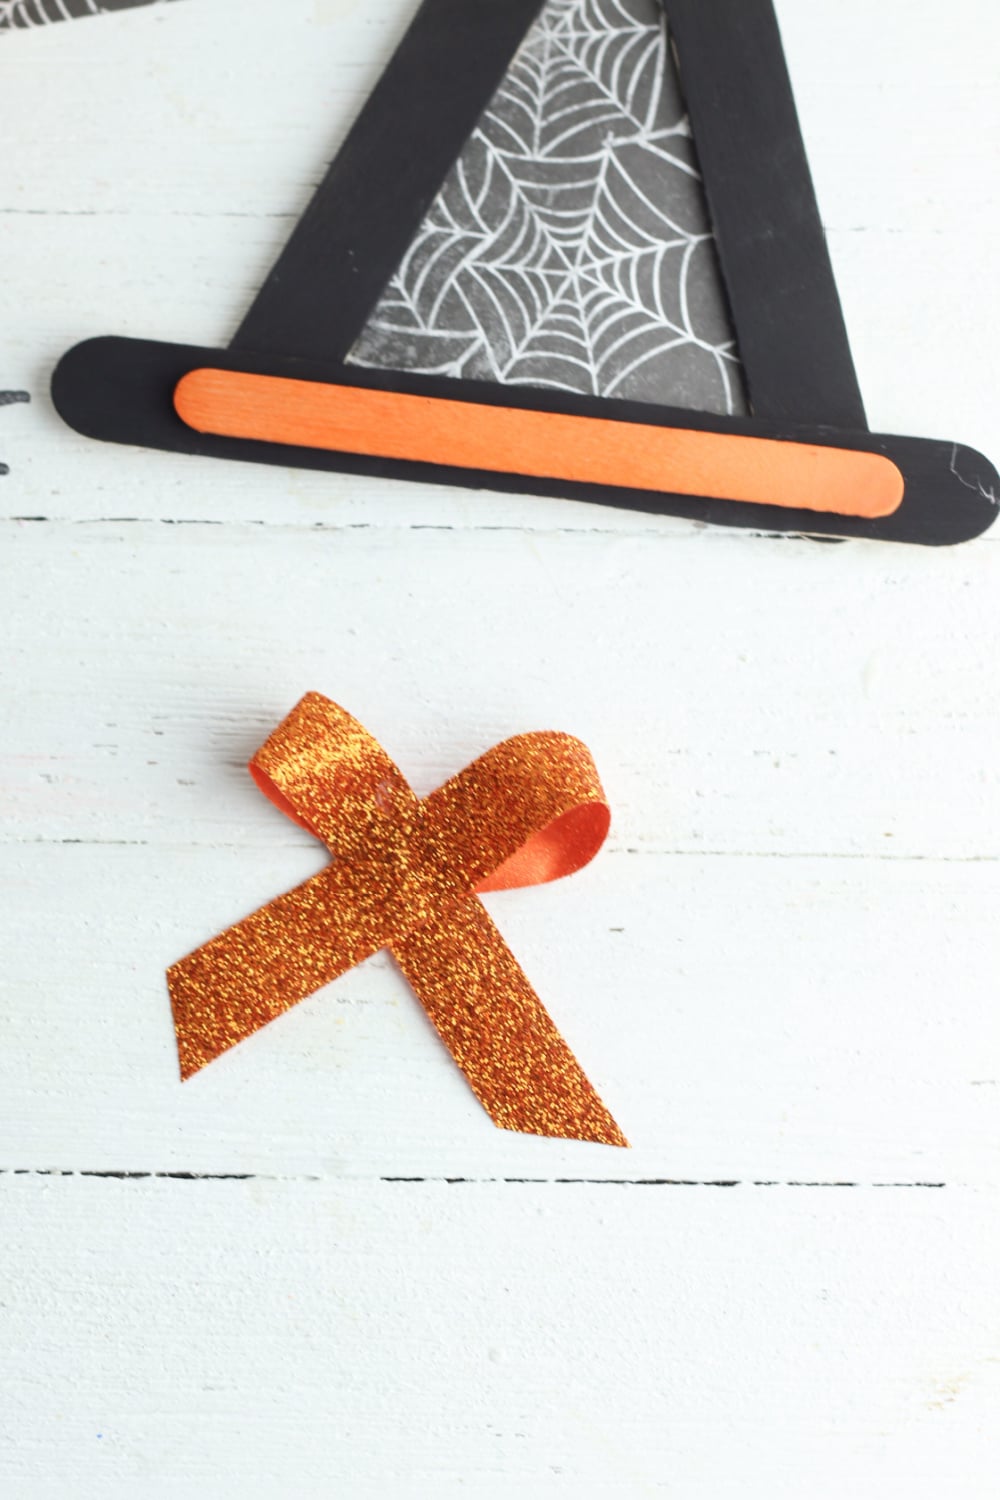
Now cut a piece of your orange ribbon. Mine measured between 4 and 5 inches. I wasn’t too exact and you can decide how big you would like it as you form it into a ribbon. You can choose not to cut the ribbon from the spool until you have figured out the size of the ribbon you want.
Once you have picked a good size, glue it down to your hat.
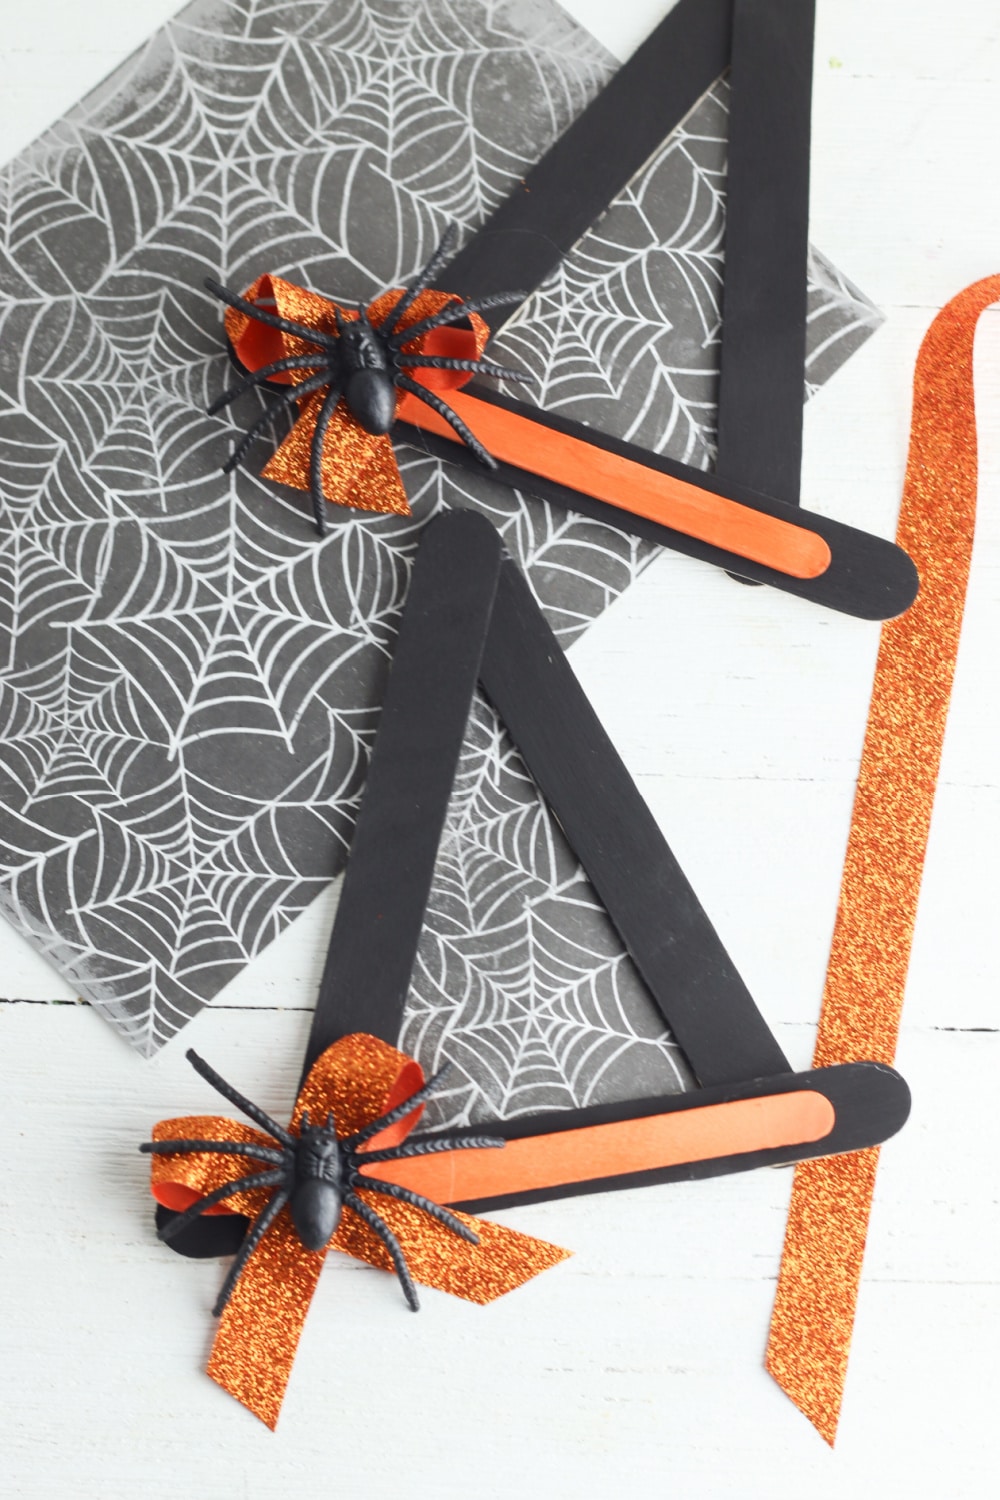
And lastly, take that adorable spider embellishment and glue it on top of your ribbon. A-D-O-R-A-B-L-E!!! Now are you done and ready to display your amazing witch’s hat just in time for Halloween!
You can pass these little cuties off to friends as gifts, place them in a boo bucket, or display them in your home. Or you can even add a magnet to the back, and you can turn it into a fridge magnet. The ideas are endless.
More Amazing Halloween Crafts
If you liked this witch hat craft tutorial, you might also love these other Halloween project ideas too:
This post may contain affiliate links or sponsored content. Disclosure Policy

Such a creative and fun Halloween craft idea! Perfect for adding a spooky touch to the celebrations.