
Make a Homemade Harry Potter Wizard Wand
Customize and make your very own personal Magic Wand! These homemade Wizard Wands are made from chopsticks and hot glue. This craft is not only perfect for your Halloween Costume but also for pretend play.
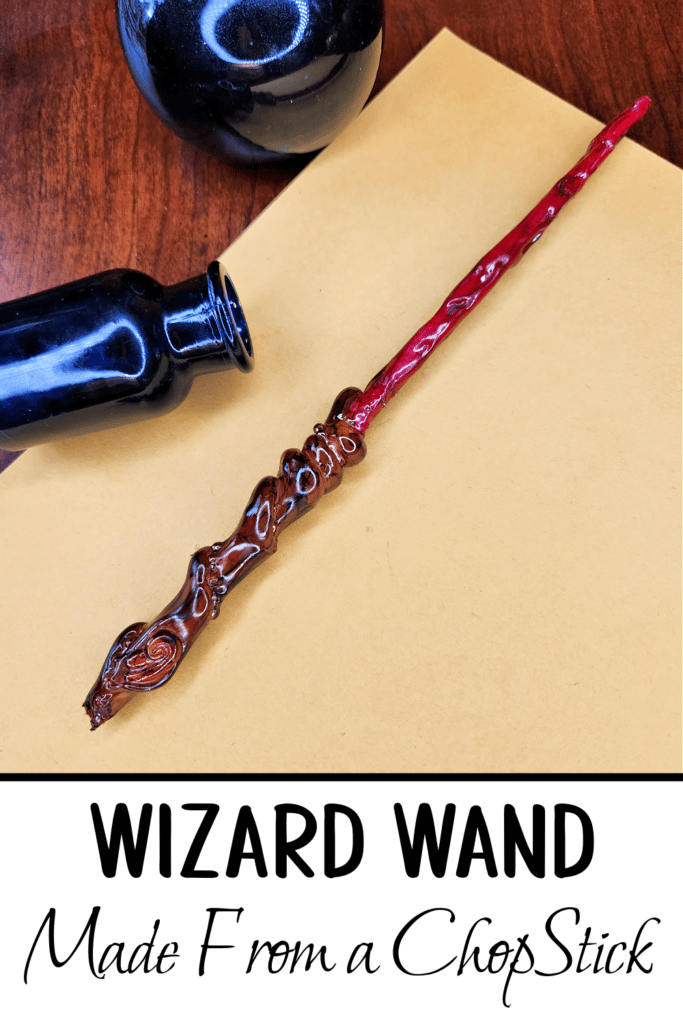
All month long, my kids have been on a magical journey. It all began by allowing them to watch their first Harry Potter Movie, the Sorcerer’s Stone. And of course, I had to make them a Realistic Homemade Wizard wand for them.
I wanted to make something special for them. So, I sat down in my “craft” room and did some brainstorming. I came up with upcycling chopsticks with hot glue. They came out so cute. And your Homemade Wizard Wands will too.
This is where your creativity will come into play. Here is how I made a Wizard Wand out of chopsticks.
Make a Homemade Harry Potter Wizard Wand
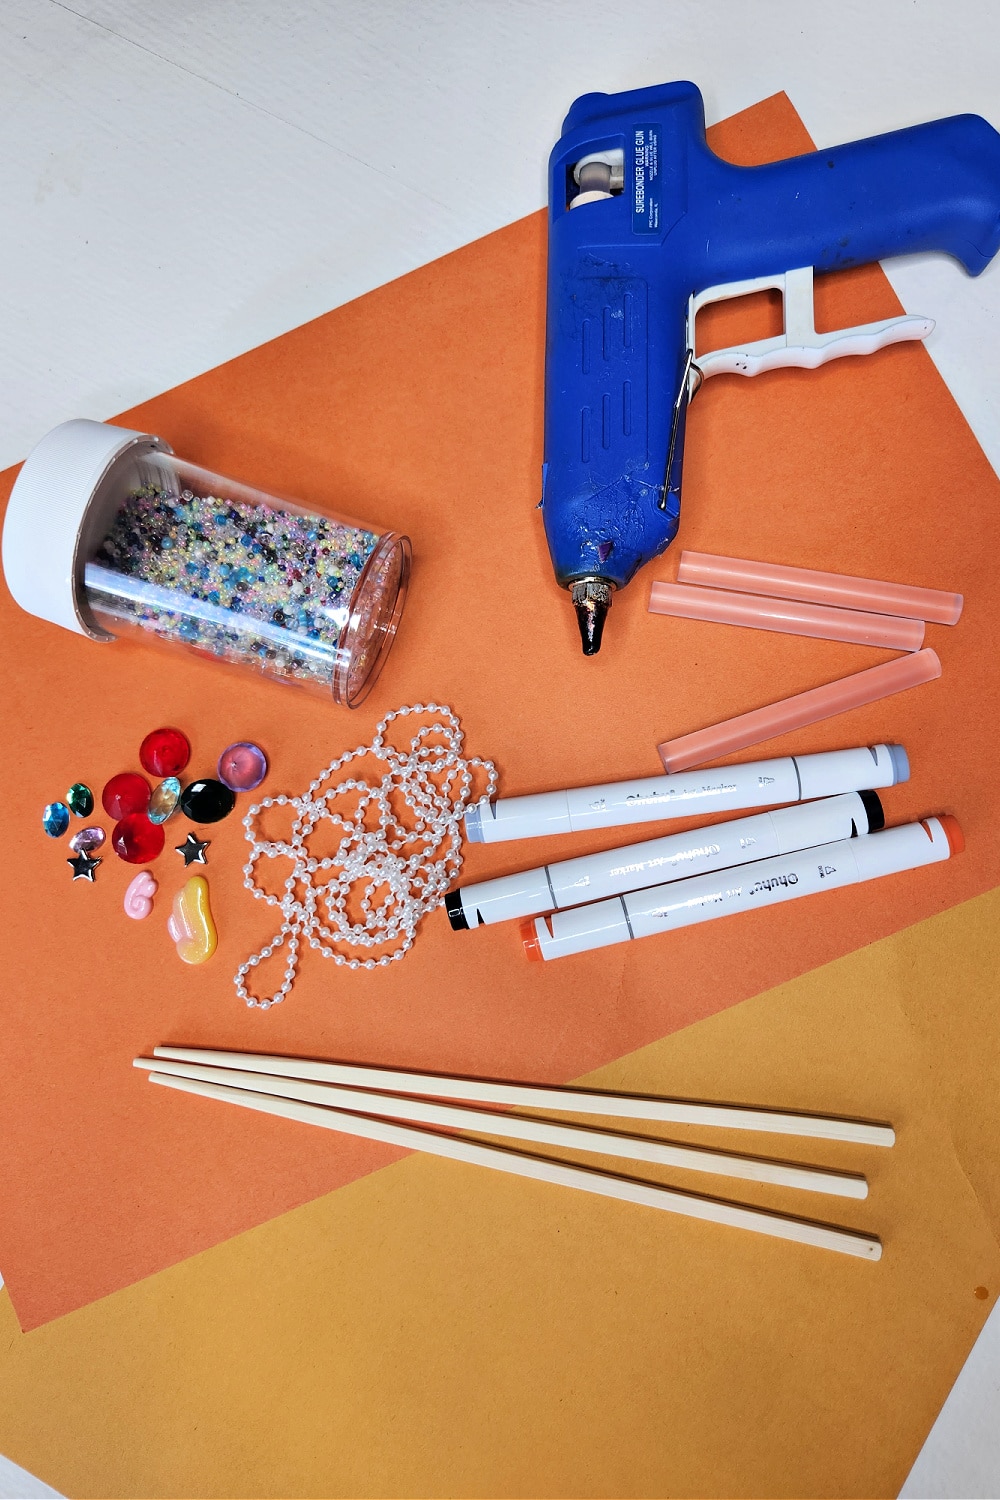
What You Will Need
- Hot Glue Gun
- Chopsticks – check your Dollar Store
- Embellishments, such as plastic beads, googly eyes, wire, beads on a string, rubber bands, etc
- Ohuhu Markers (more on why these specific markers)
Tips for Creating These Wands
If you don’t have any chopsticks, head outside and gather some sticks. When outdoors, look for sticks that are nice and straight and not too thin. It doesn’t matter if they have some bumps and knots — these can add to the character!
I have tried a variety of markers, from Sharpies to school grand markers for this craft. The only ones I have found that do not bleed onto the skin after drying are Ohuhu Markers.
Wand Design Ideas
Whether you want to know how to make a Harry Potter wand or you just want to make a cool Halloween costume prop, this craft tutorial will give you the basics on creating your unique wand.
With a variety of embellishments, your imagination can create a special and unique wand and give it a more realistic look.
Let’s Get Started – Step-by-Step Instructions
Please note there are printable instructions available at the bottom of this post.
STEP ONE: First, heat your hot glue gun.
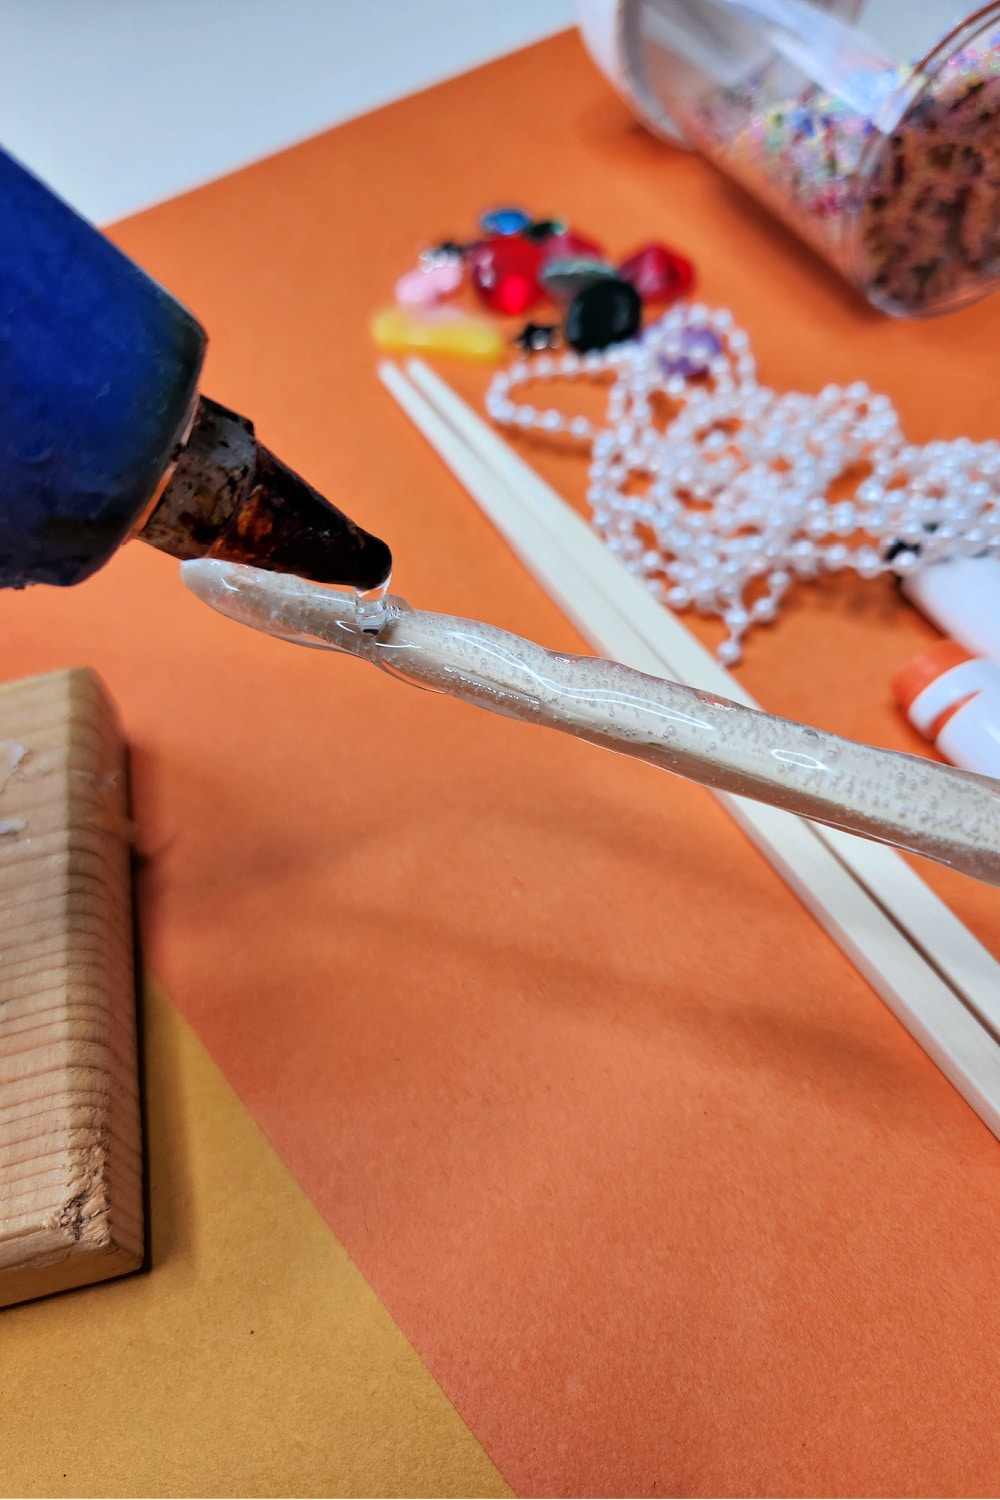
STEP TWO: Start with the base of your wand. Using hot glue, cover the base with hot glue. See the photo below. You will be adding strips or lines of hot glue on your chopsticks. When you have completely made it around the “top” portion stop.
Only one coating will be needed.
STEP THREE: Switch to the bottom portion. This is the fun part. I like to layer hot glue on the bottom portion. Once the glue is to the point of stabilization (or no movement) repeat the steps above again.
Typically, three times. Twirling as you go. The hot glue will do its own thing with your guidance. This will make the handle. Twirl, Twirl, Twirl. See the photo above.
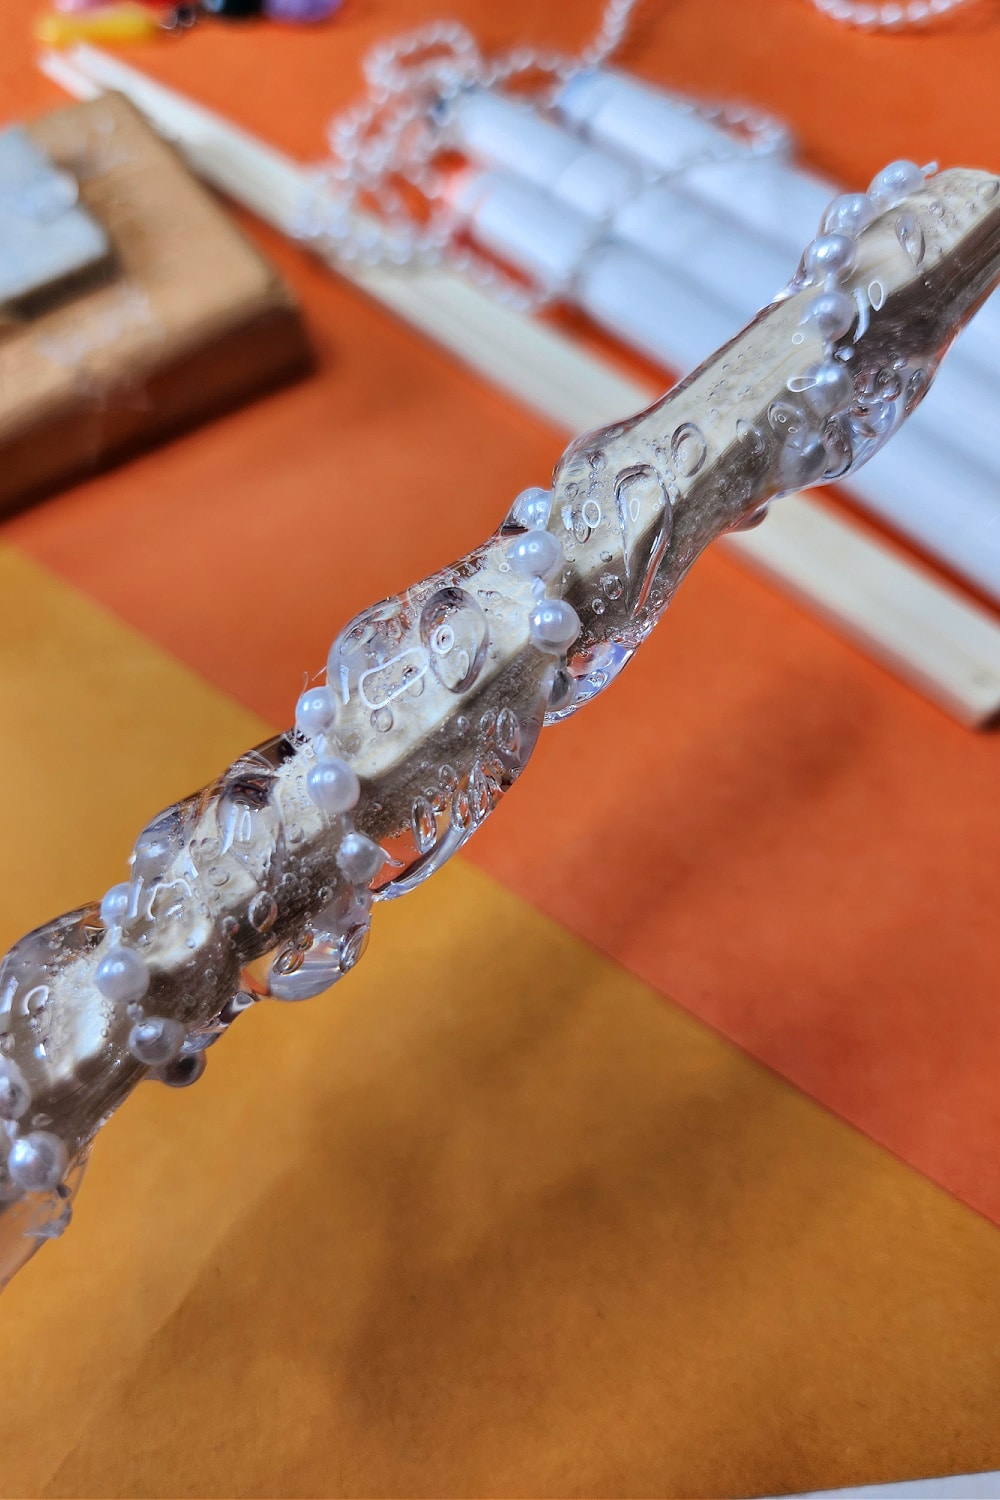
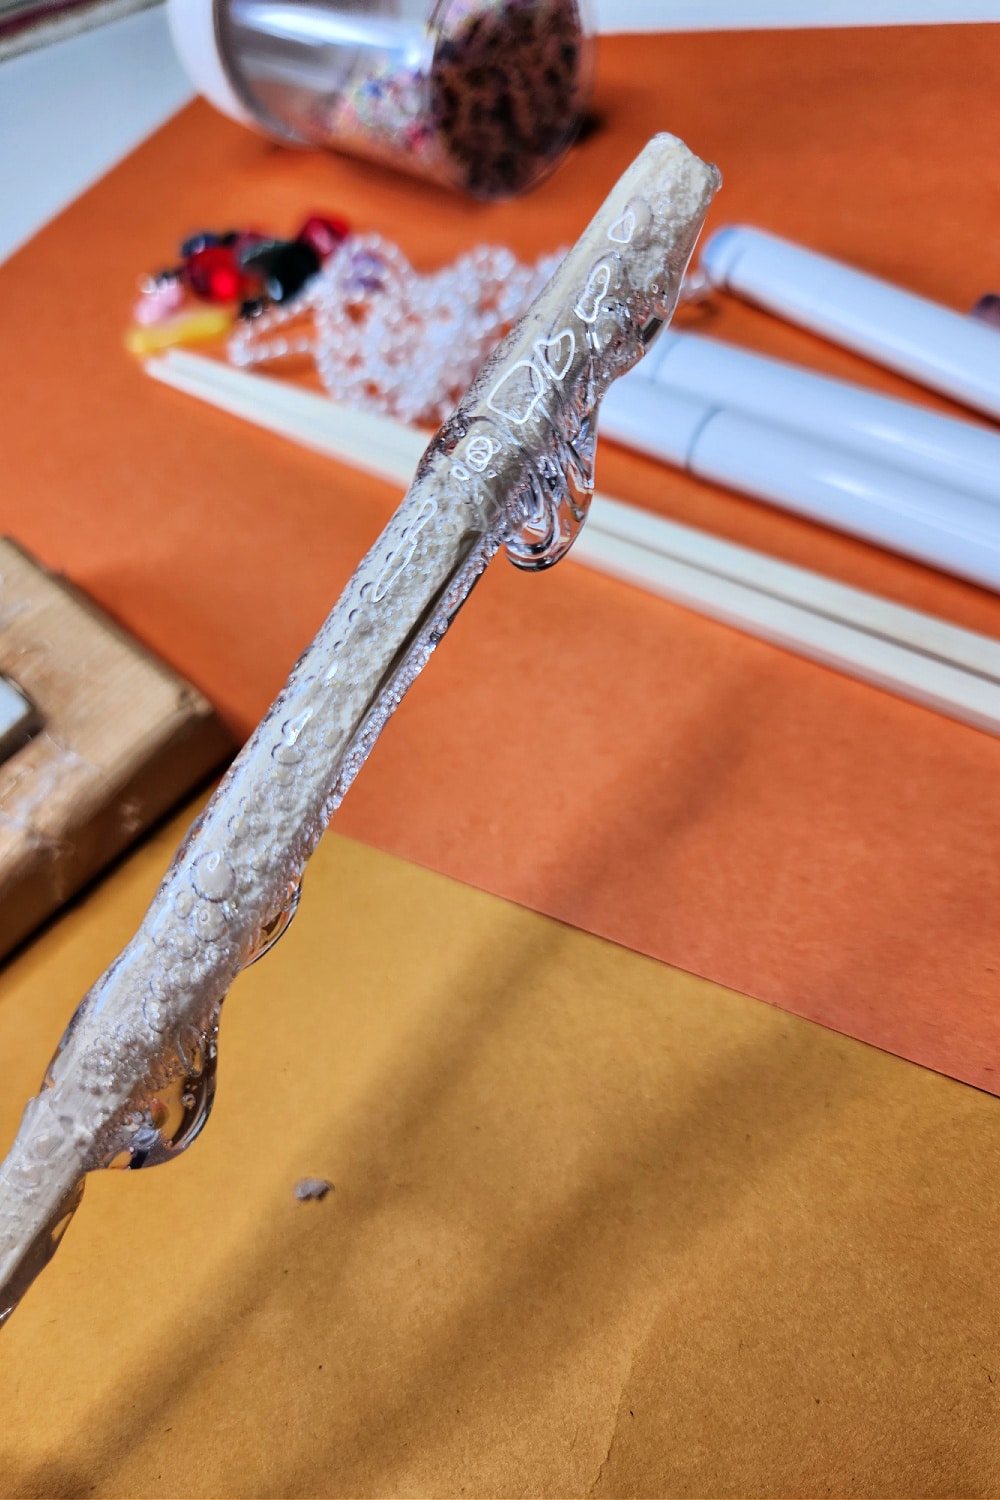
STEP FOUR: This time, right after your last layer of hot glue, add any embellishments to bling your wand out. Let completely set (roughly 5 to 7 minutes).
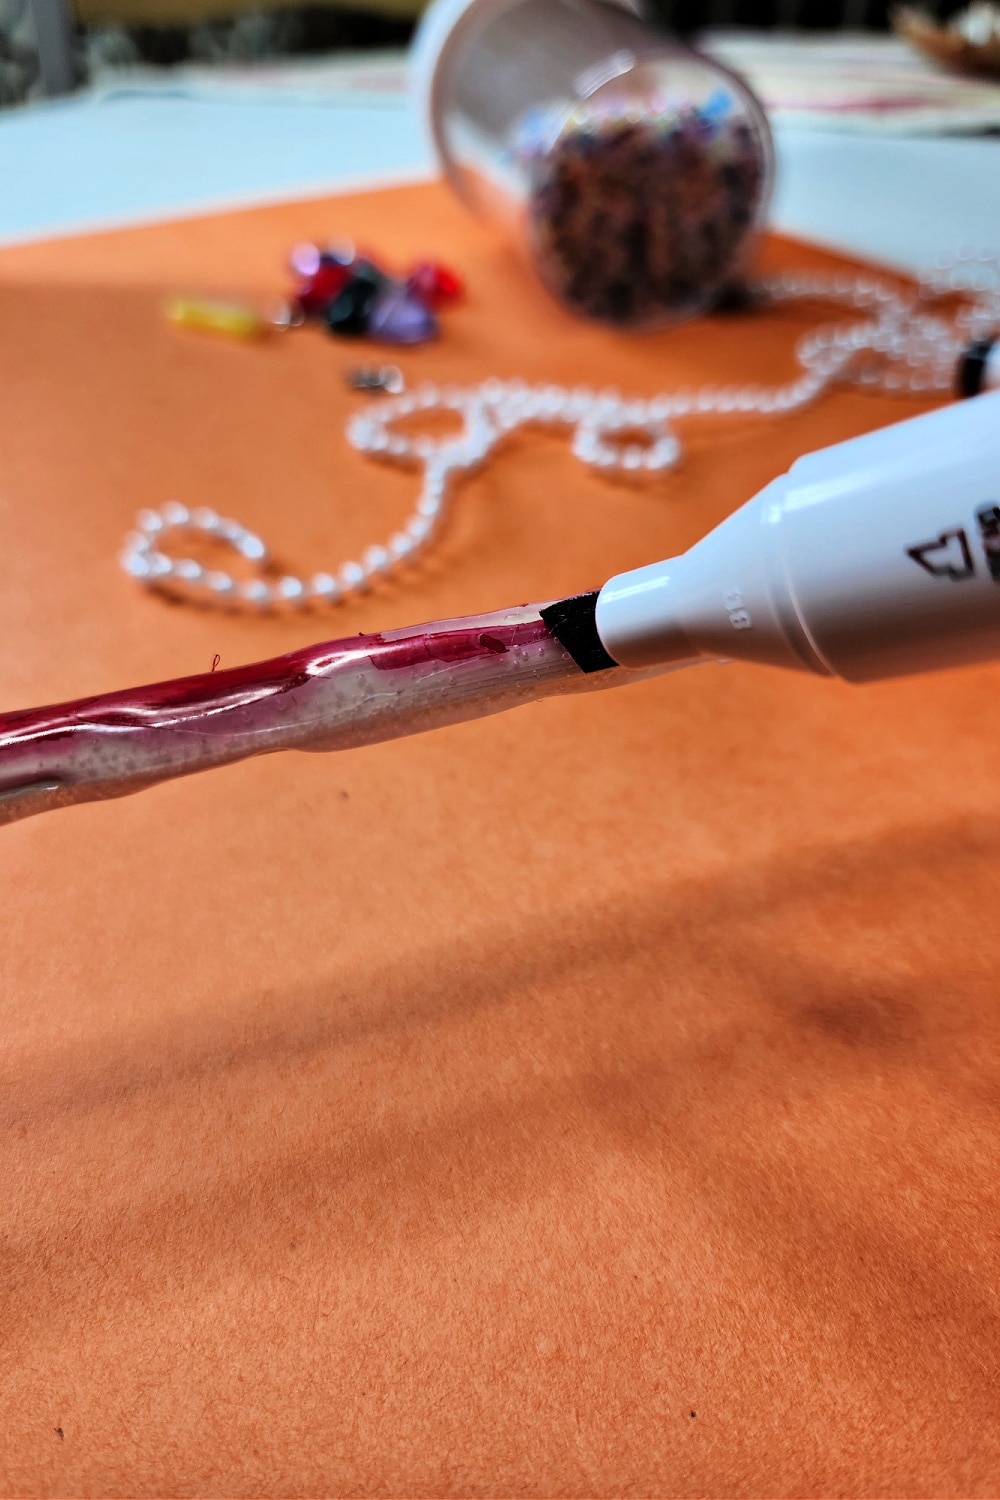
STEP FIVE: Bringing your wand to life is as simple as using Ohuhu markers. These are the best markers for coloring over hot glue. Once the marker dries on your wand, it will not rub off. In years past, I have used Sharpie markers and found the marker all over my hands.
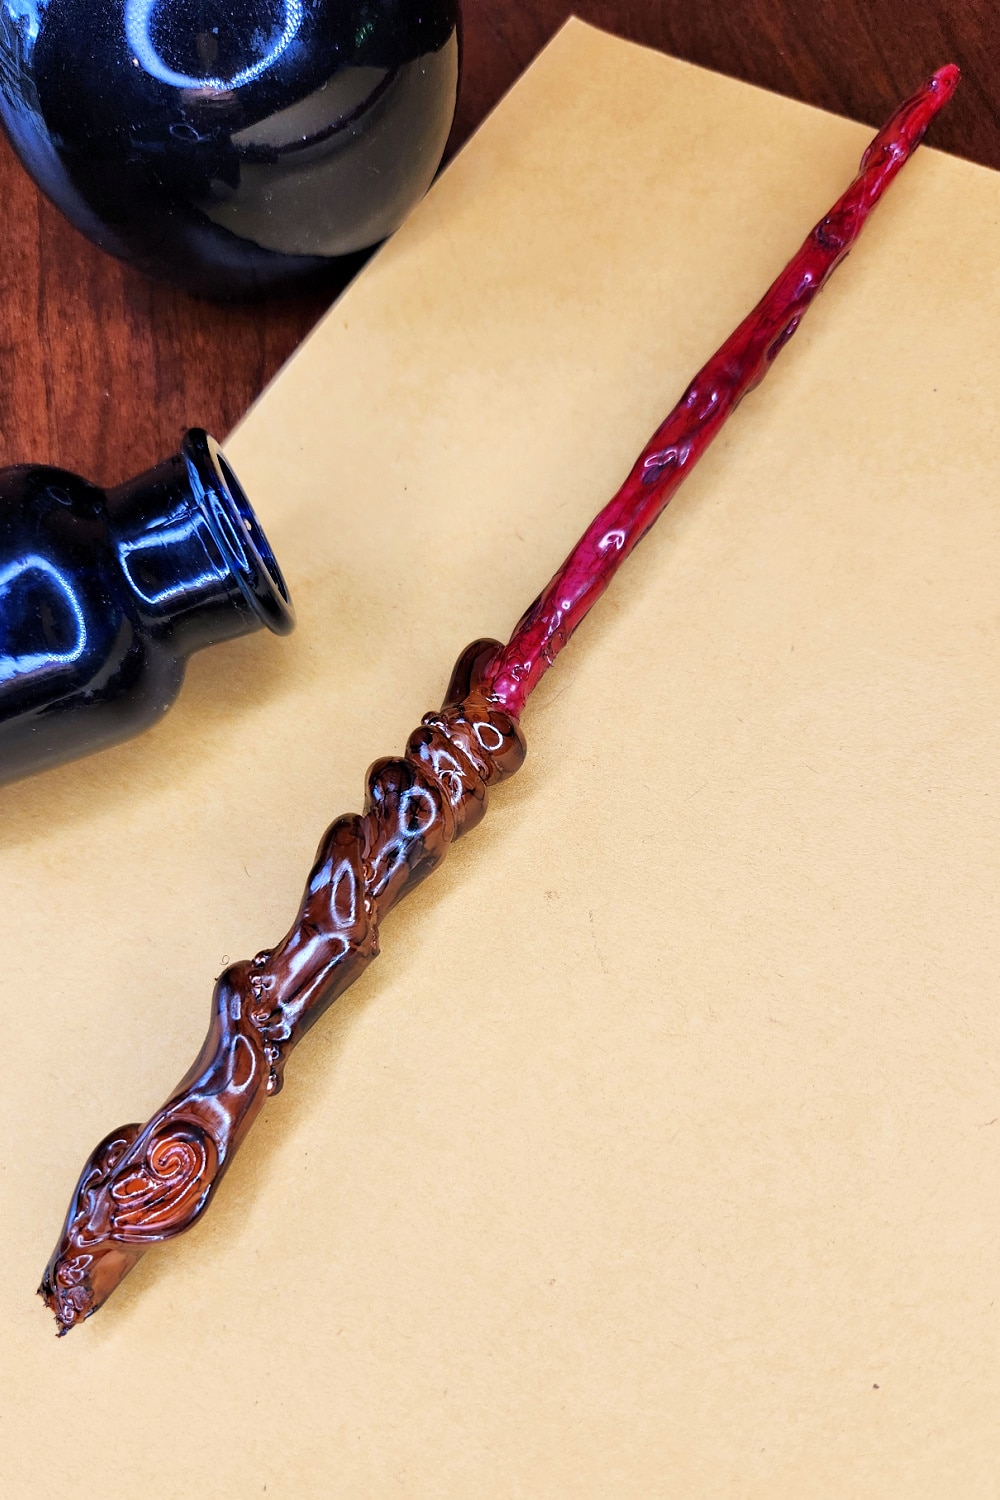
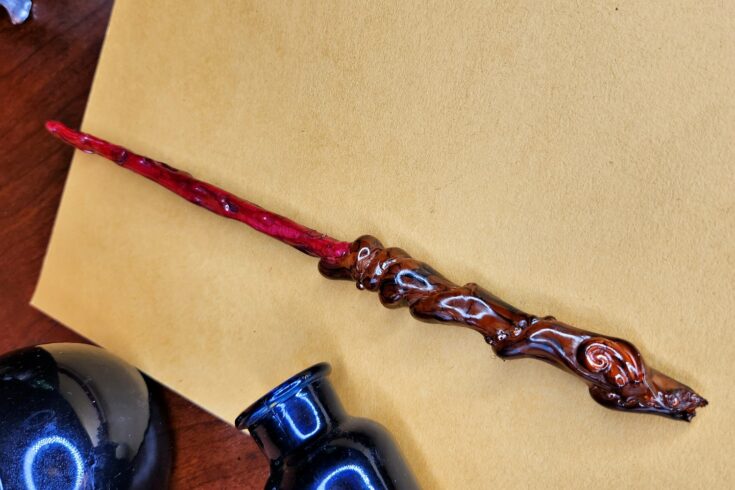
This step took me about 5 minutes to complete. I wasn’t being too particular. I also colored over the embellishments. Your end product will look similar to the very first image. This whole process for 2 wands took roughly 30 minutes to complete.
The fun and creativity are endless. It is time to let the magic begin with the wonderful people in your lives! Here are a few Harry Potter spells to get you started.
Other FUN DIY Halloween Crafts
DIY Frugal Frankenstein Mason Jar Beverage Cups
Witch Hat Popsicle Stick Halloween Craft
Halloween Candles Made from Toilet Paper Rolls
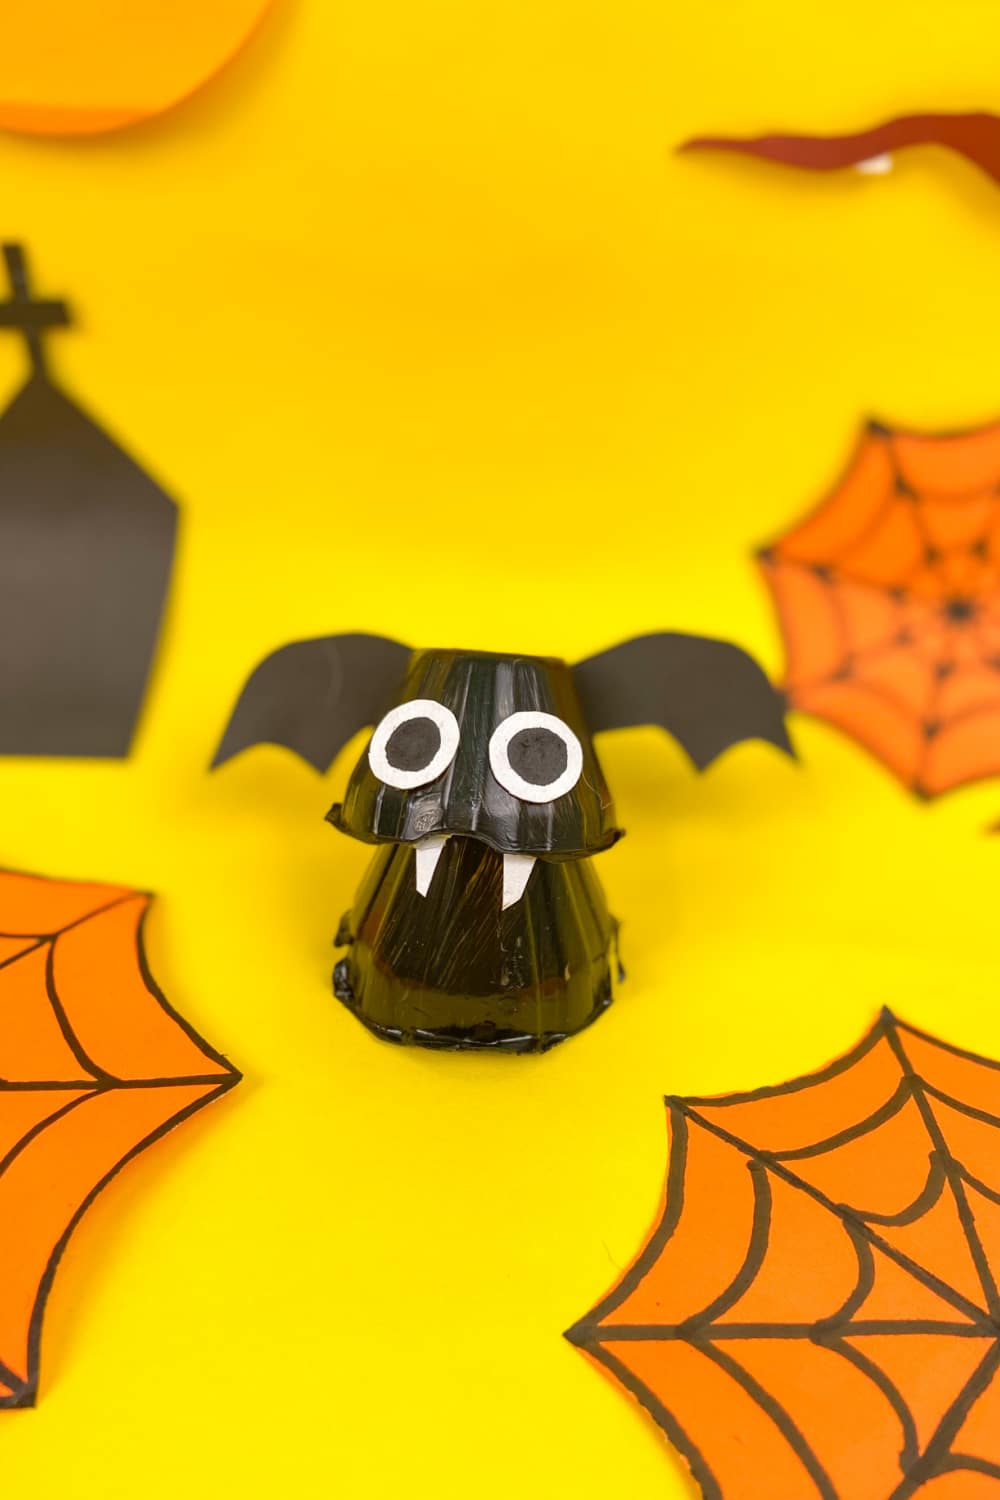
Halloween Bat Made from Egg Carton
Realistic Homemade Wizard Wands
Make homemade Wizard Wands out of chops sticks and hot glue. This craft is not only perfect for your Halloween Costume, but for dress up too.
Materials
- Chopsticks
- Embellishments
- Ohuhu Markers
- Hot Glue Sticks
Tools
- Hot Glue Gun
Instructions
- First, start with the base of your wand. After your glue gun is completely heated and ready to go, make strips or lines of hot glue on your chopstick. When you have completely made it around the base once. Twirl. This is the best part. The hot clue will do its own thing with your guidance.
- Once the glue is to the point of stabilization (or no movement) repeat the steps above again. This will make the handle. Twirl, Twirl, Twirl. This time add any embellishments to bling your wand out. Let completely set (roughly 5 to 7 minutes).
- For the tip of the wand, using the hot glue gun, slowly add in your lines with a light squeeze. Making sure you are not adding copious amounts of glue. You will not need to twirl since this will be a very small amount of glue.
- Bringing your wand to life is as simple as using sharpie markers. Now is the time to start coloring away.
- Let dry just a few minutes and your wands are complete.
Notes
Please note that glue gun craft may not be suitable for the very younger and will need adult supervision and assistance.
This post may contain affiliate links or sponsored content. Disclosure Policy

Haha, I love this! Twirling hot glue like its a magic potion? Brilliant! Seriously though, the Ohuhu markers not bleeding onto skin is such a clever tip – Ive been dying to find that magic marker too! And 30 minutes for two wands? Thats faster than my attempts to assemble IKEA furniture without laughing! Definitely adding this to my spooky season fun list. Who knew chopsticks and hot glue could be so enchanting? 😉
I’m gonna have to make one for Isabel. She just finished the first book and watch the first movie for the first time and all she thinks about now is Harry Potter!
That would be fun!!! We could join you guys. We could have a wizarding wand fun. We love Harry Potter too. Noah’s room is nothing but Harry Potter.
Well this looks like tons of fun! Just pinned!
Thanks Maura!!! My kids have been going NUTS with their wands.
Those are so COOL! I can’t wait to try making one. Hope they come out just as good