
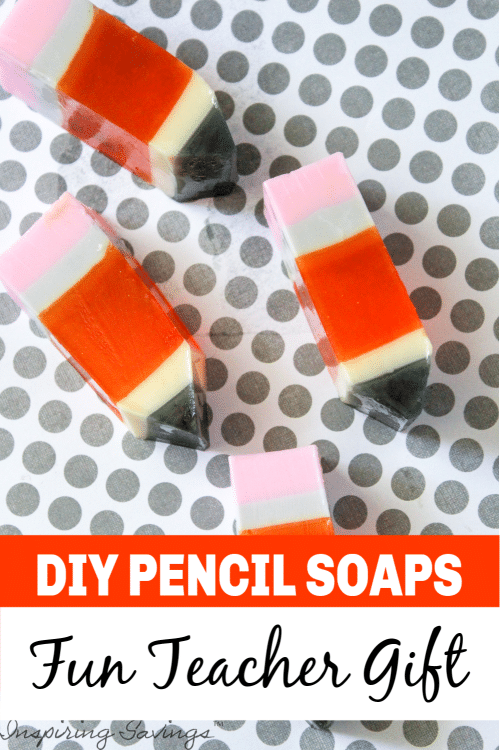
Easy Melt & Pour Pencil Soaps Teacher Gift
These melt-and-pour pencil soaps are the perfect gift for your child’s teacher. This homemade craft is a fun idea as a Christmas, teacher appreciation, or anytime gift. Made with your favorite essential oils.
Easy Melt & Pour Pencil Soaps Teacher Gift
Trying to think of a unique and fun gift for your favorite teacher? Grab your kids, because they are not going to want to miss out on this fun craft.
These soaps look and smell amazing and will make your kids go “WOW, I just made these!” I let my kids pick out a favorite essential oil that they know their teacher will like. My daughter picked Lavender and my son picked peppermint.
If you are looking to learn how to make homemade soap bars with an easy recipe, then this is the one for you! You can find soap-making procedures and ingredients below for this fun DIY craft project.
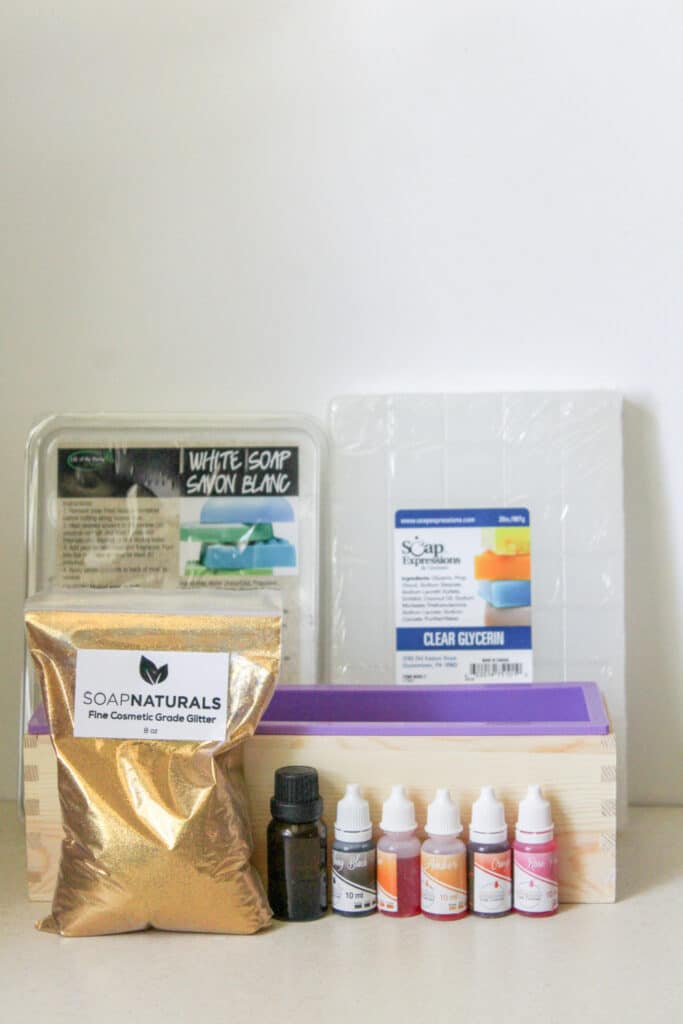
Homemade Pencil Soaps Supplies Needed:
- White soap base and opaque soap base – will be used to create the base of the melt and pour soap.
- Soap colorings – I use a package that has multiple colors. The colors I used were: black, amber, orange-red, rose pink, and sunset yellow
- Essential oil – I used lavender, but feel free to use any scent (or no scent) you would like
- Cosmetic grade glitter – You can skip this add-in if you like. I just like to give the soap a little sparkle.
- Soap mold and bowls: Will be needed to mix your base and colorings. I used metal mixing bowls. This way the coloring doesn’t transfer over.
You can find most of these items at Michael’s, Hobby Lobby, or I have the links for Amazon above.
How to Make Homemade Pencil Soap For Teachers Instructions:
STEP ONE: Gather your soap-making supplies.
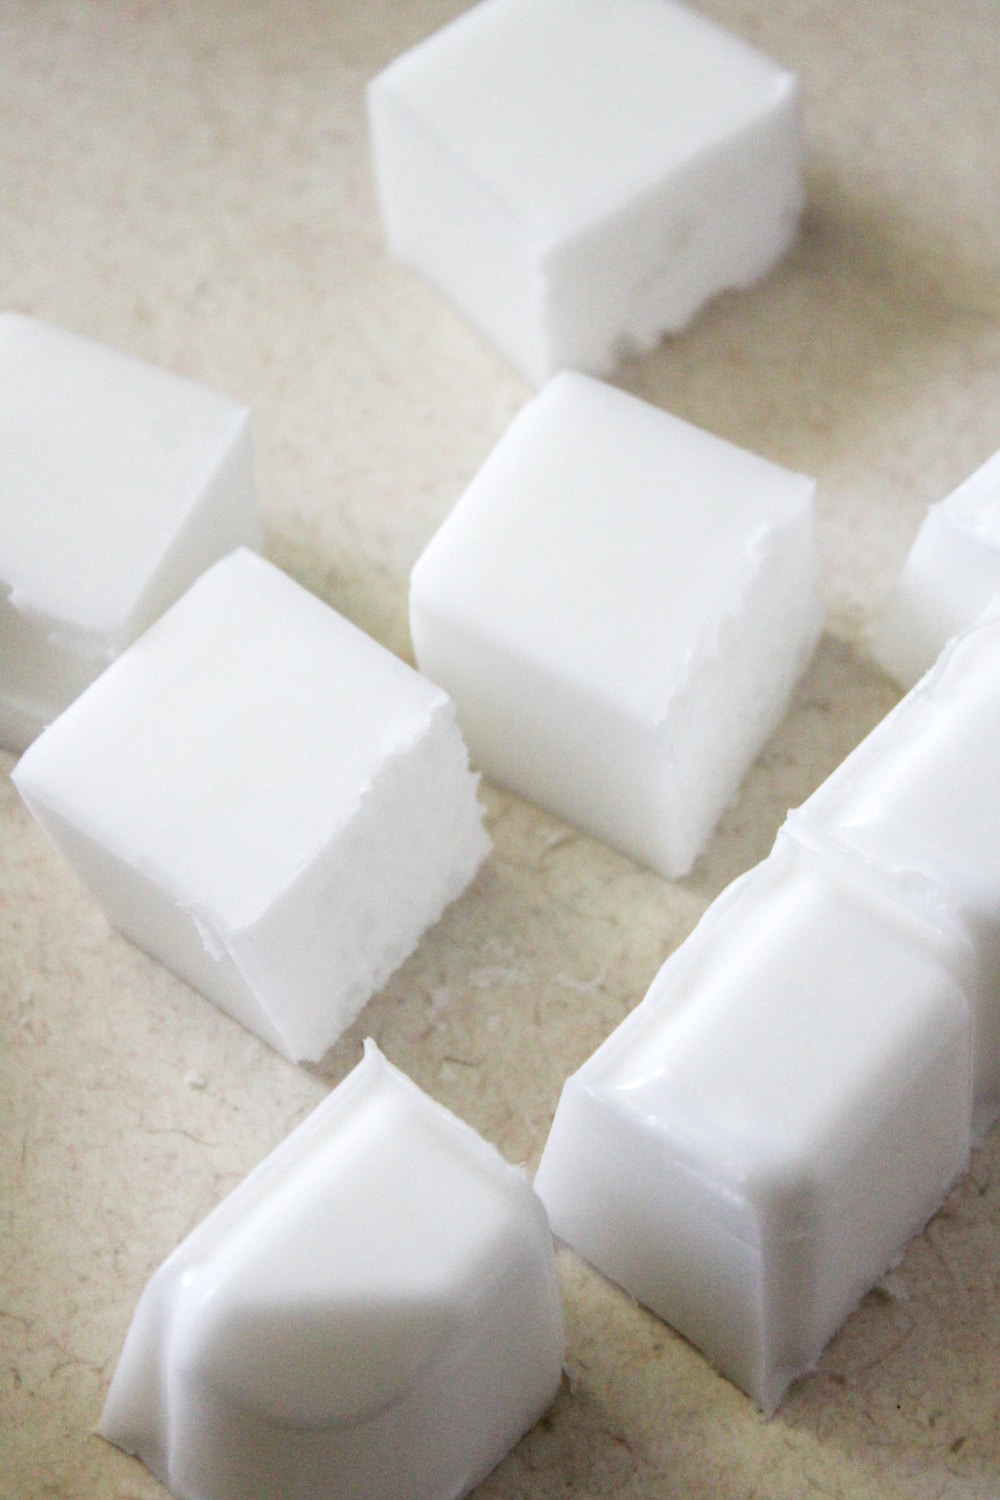
STEP TWO: We will be adding what we need into 5 separate bowls. Please note: the soap bases come in a grid of squares from the store. You will need to cut along the lines of rows to make melting the soap base easier.
Add the following amounts to each bowl: DO NOT ADD COLORING UNTIL AFTER THE SOAP BASE HAS BEEN MELTED. I added the coloring just so you can be prepared for what is expected.
– Bowl A (Pencil Tip): Add 10 squares of opaque soap base – dyed black. Add enough drops to reach a dark black color.
– Bowl B (Sharpened part of pencil): Add 10 squares of white soap base – Add a few drops of amber to form a creamy white.
– Bowl C (Body of pencil): Add 20 squares of opaque soap base – Add a mix of sunset yellow and orange red, and gold glitter.
– Bowl D: (Metal eraser holder) Add 5 squares of white soap base – Add a few drops of black to form a grey.
– Bowl E (Eraser): Add 10 squares of white soap base – Add a few drops of rose pink.
STEP THREE: We will be working in layers. First, starting with Bowl A. Heat your soap base in the microwave in 30-second intervals until melted. Mixing between intervals.
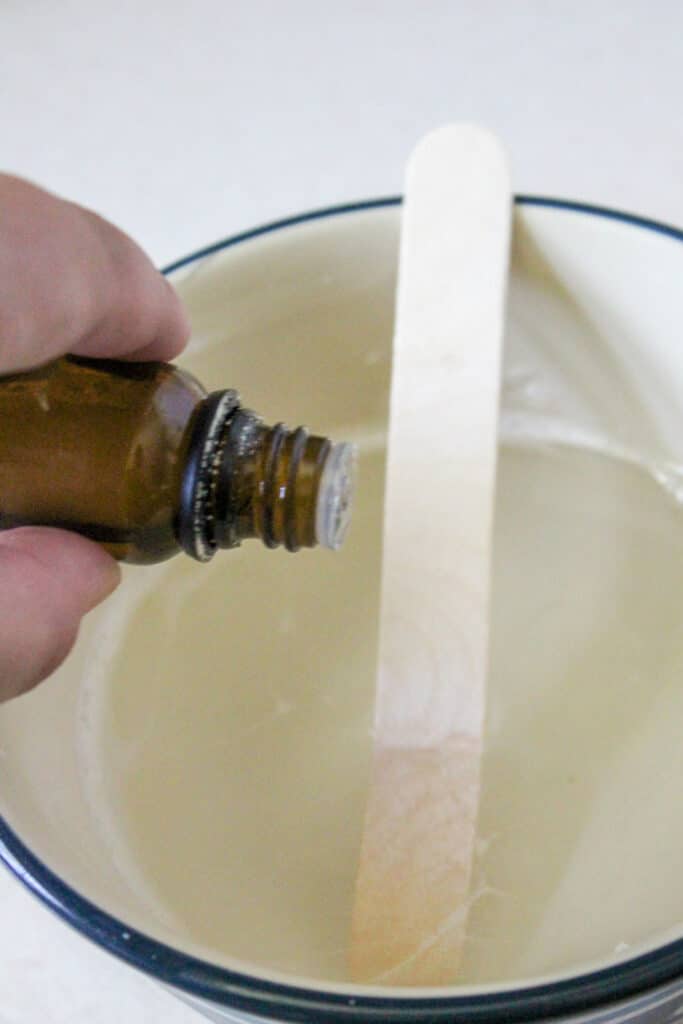
STEP FOUR: Once melted, add black coloring and stir. If you are adding essential oils, this is the step you will want to do so.
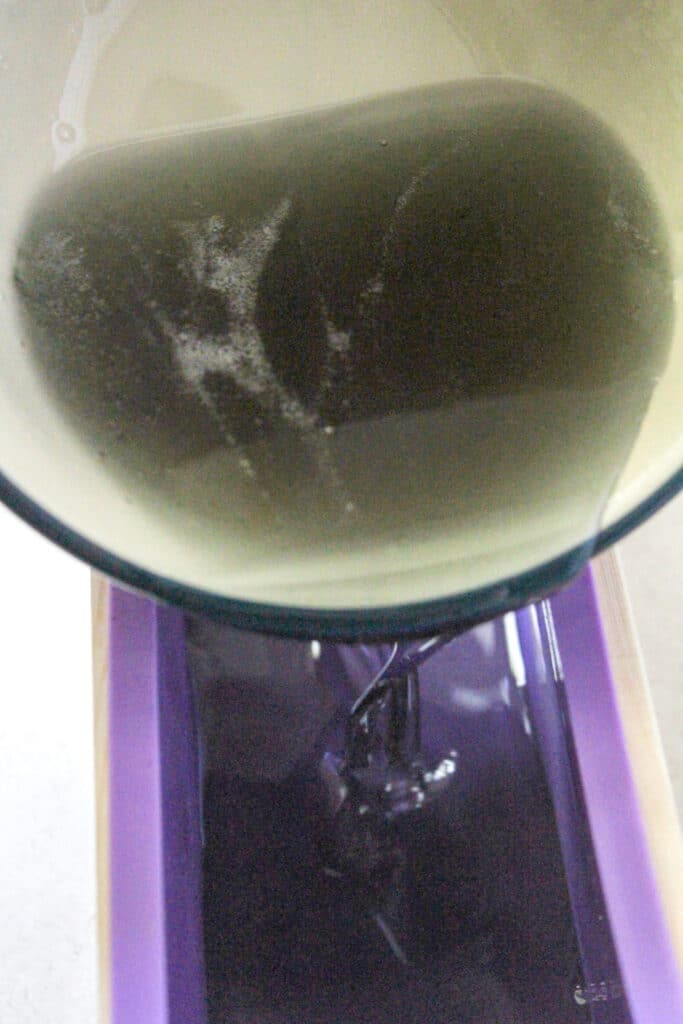
STEP FIVE: Pour the melted soap base into your soap mold. Allow the soap to set (10-15 minutes). This will allow it enough time to set up and be ready to take on the next level.
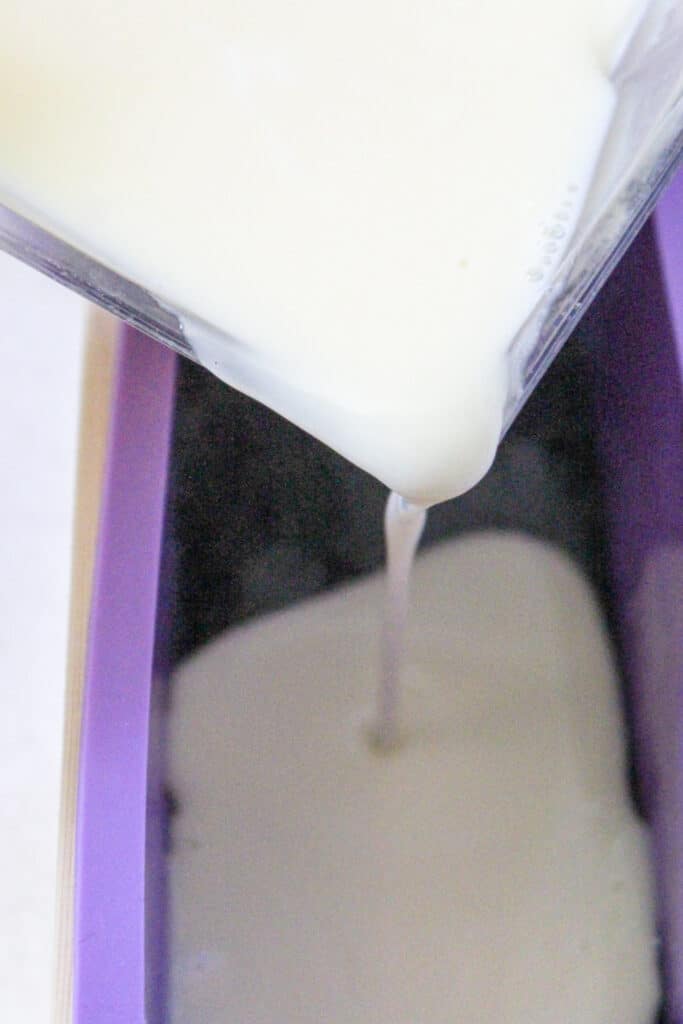
STEP SIX: Repeat the steps above for the remaining four bowls. Layering in the soap mold as you go.

STEP SEVEN: After you have finished adding your last layer to the soap mold, let it rest for at least four hours. This will allow it time to set.
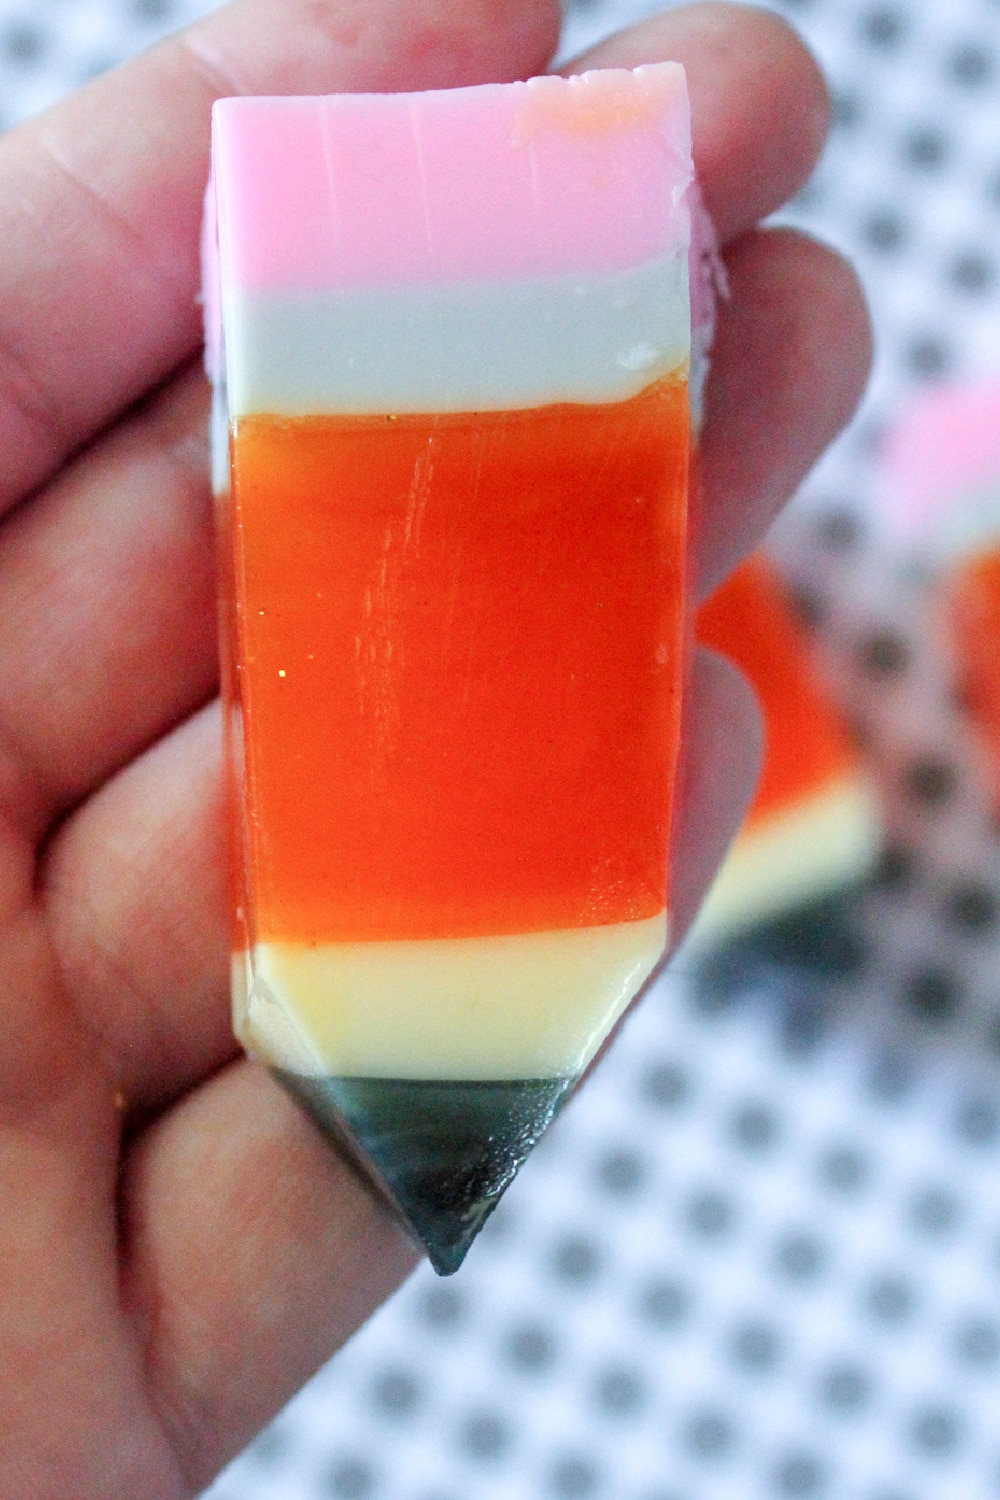
STEP EIGHT: Lastly, cut into bars. Then cut each bar into thirds. On the bottom layer (the black layer), cut two angles to form a point. Viola!! You are done.
You can add each soap into a clear plastic bag. Adding a nice ribbon or bow to the top.
Other Great Craft Like Teacher Gift Ideas
Mickey Mouse Mason Jars – Perfect for Holding Treats, Pencils or Supplies
Easy Shower Jelly DIY Recipe – Get A Spa Experience At Home
Easiest Homemade Dishwasher Detergent Tablets With Essential Oils
This post may contain affiliate links or sponsored content. Disclosure Policy


One Comment