
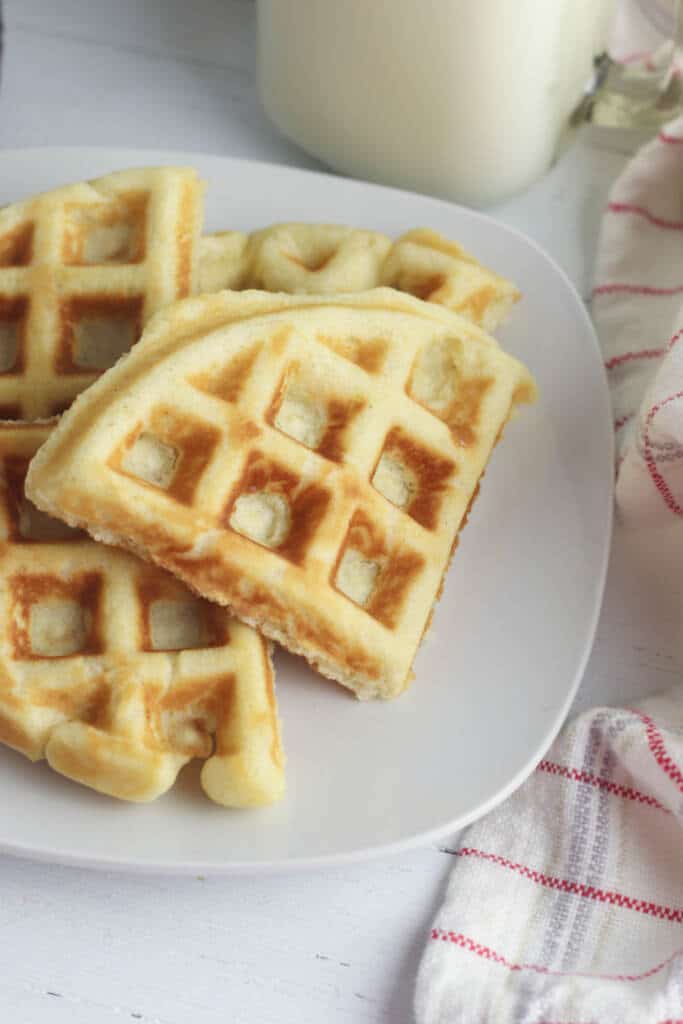
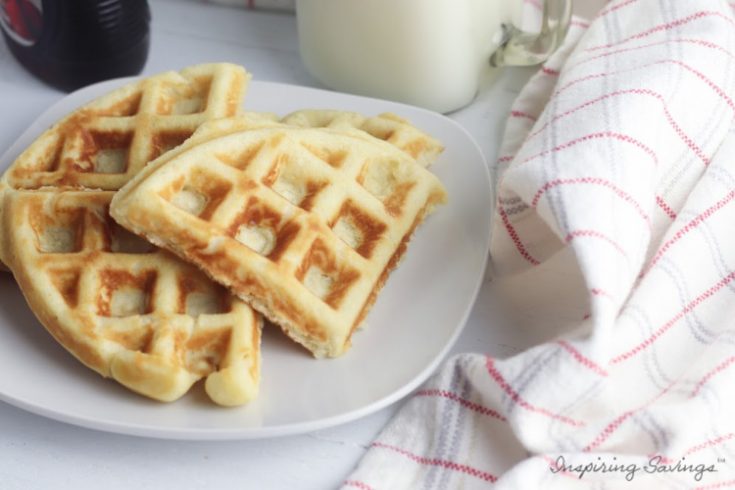
Gluten Free Homemade Belgian Waffles
⭐️⭐️⭐️⭐️⭐️This recipe has been developed and tested by me and my family; it is not generated by AI.
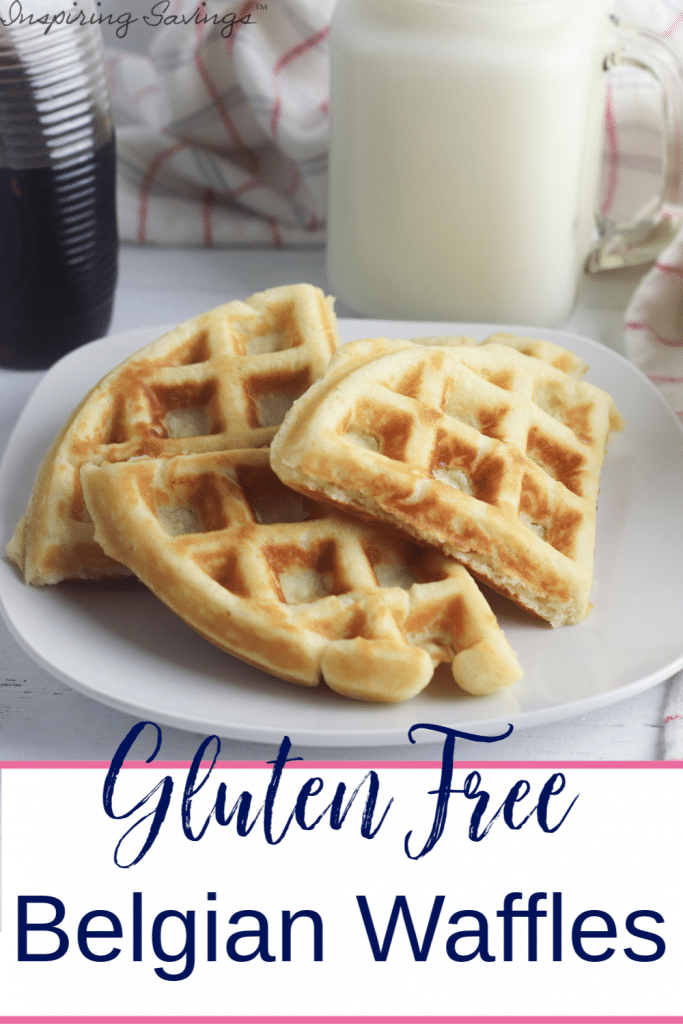
These Gluten-free homemade Belgian waffles are just like you would expect from regular waffles. They are soft and chewy on the inside and have an amazing flavor. They’re perfectly sweet and delicious with maple syrup and fresh berries on top!
| Prep Time: 10 Minutes Cook Time: 20 Minutes Total Time: 30 Minutes Servings: 5 Waffles |
Waffles are a BIG STAPLE. Come Saturday, my husband is batch-cooking up waffles for the kids. HE IS THE BEST! You see, he makes enough that the kids can have that morning and freezes the rest for them to have during the week. I love waking up on Saturdays to the smell of homemade waffles.
These waffles are surprisingly easy to make. And they pair nicely with our Homemade Pork Sausage Patties or our Homemade Pancake Syrup.
Why You Will Love These Gluten-Free Belgian Waffles
It’s Adaptable: You can definitely add in chocolate chips or blueberries right into the batter! I suggest about 1/2 cup of whichever you prefer. Also delicious with a mix of both!
Made from Wholesome Ingredients: They offer a delightful, light texture that’s crispy on the outside and fluffy on the inside—just like traditional waffles. They cater to those with gluten sensitivities without sacrificing flavor.
Gluten-Free Baking
I would like to first introduce you to the Belgian Waffle Iron that we like to use. If you already don’t own one.
When it comes to baking and cooking, I am all about it. When my husband and I started to have issues with food that contained gluten, we started the process of learning all about it. To reduce our food budget, I started experimenting with flours and found it more cost-effective to make a lot of our food. As you know, pre-packaging ANYTHING costs much more for the sake of convenience.
Yes, we often find great sales, and when we do, I stock up. Our favorites include: Schar’s gluten-free pizza Crust, Blue Diamond Nut-Thins (all the flavors) & Great Value Gluten-Free Brown Rice Spaghetti.
Ingredients Needed
Please note that a full list of ingredients and a printable version of this recipe is available below.
- Gluten-free baking flour – Our family prefers to use Cup for Cup Gluten Free Flour. Not all gluten-free flours are created equal. You may experience different baking results depending on the gluten-free flour blend you choose.
- Granulated sugar – Used to sweeten the waffles.
- Baking soda – Helps stabilize and keep the waffles fluffy.
- Salt – Enhances the natural flavor of the waffles.
- Milk – Keeps these waffles nice and moist. For a dairy-free option, use unsweetened almond, cashew, or coconut milk.
- Eggs – Help to bind all the ingredients together. Gluten-free ANYTHING, due to the loss of gluten, falls apart much more easily. The eggs keep the waffles stable and strong.
- Vanilla extract – Gives flavoring and depth to these waffles.
- Butter – Gives these waffles a rich, creamy flavor.
How to Make These Waffles
STEP ONE: Preheat your waffle iron.
STEP TWO: In a large bowl, whisk together the gluten-free baking flour, sugar, baking soda, and salt. Set aside.
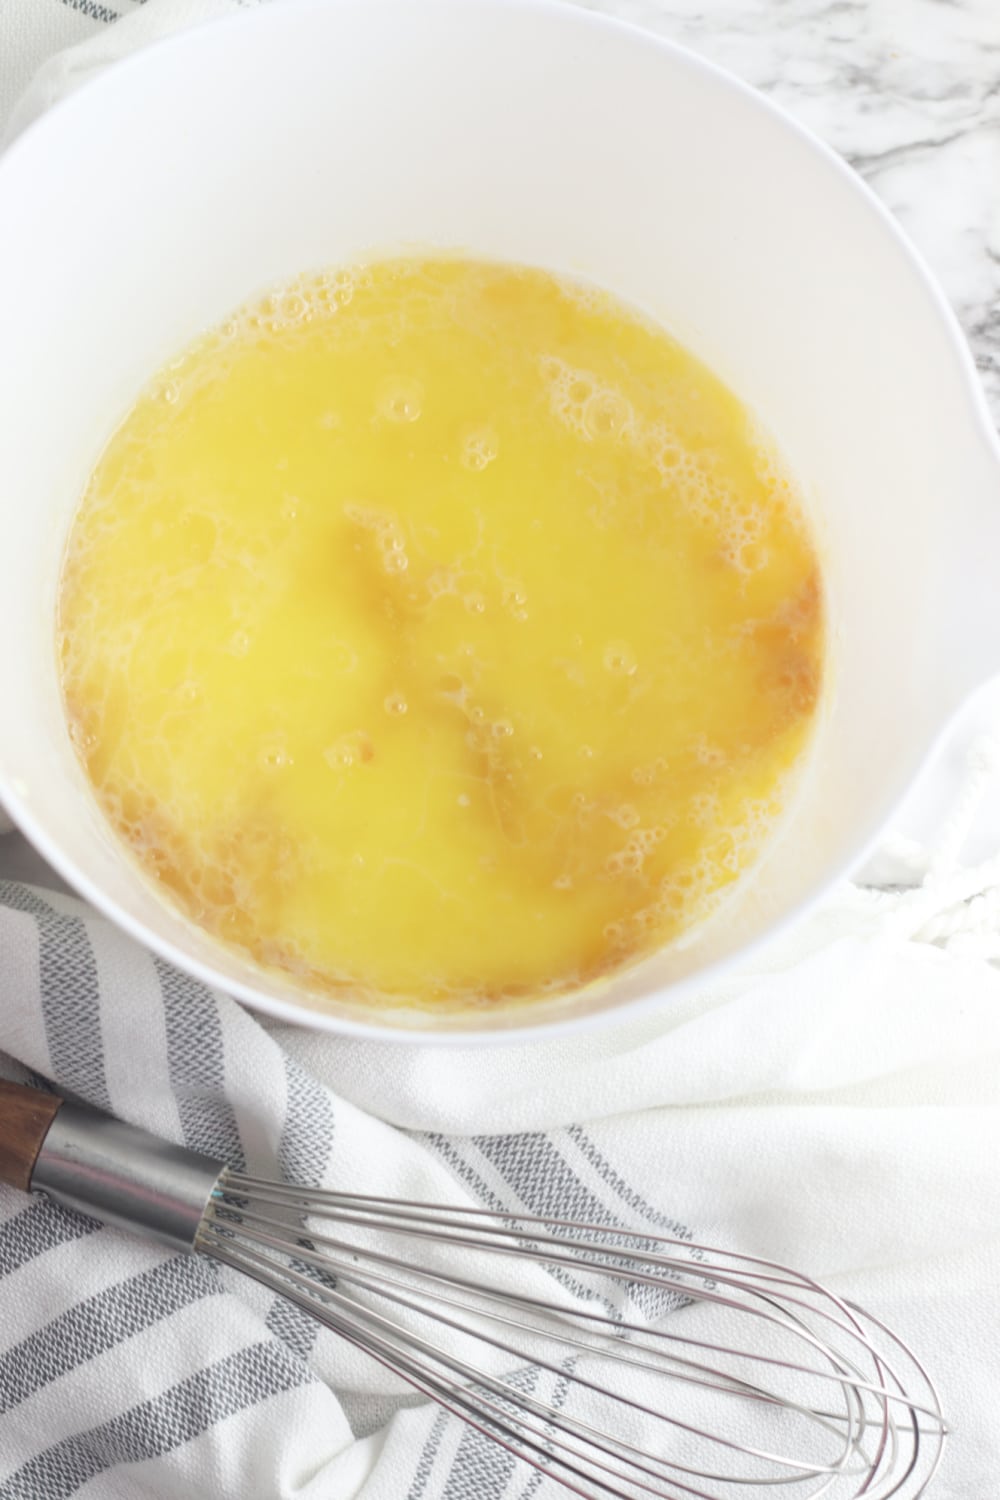
STEP THREE: In a separate bowl, beat together the milk and eggs. Add the vanilla extract and melted butter and mix to combine.
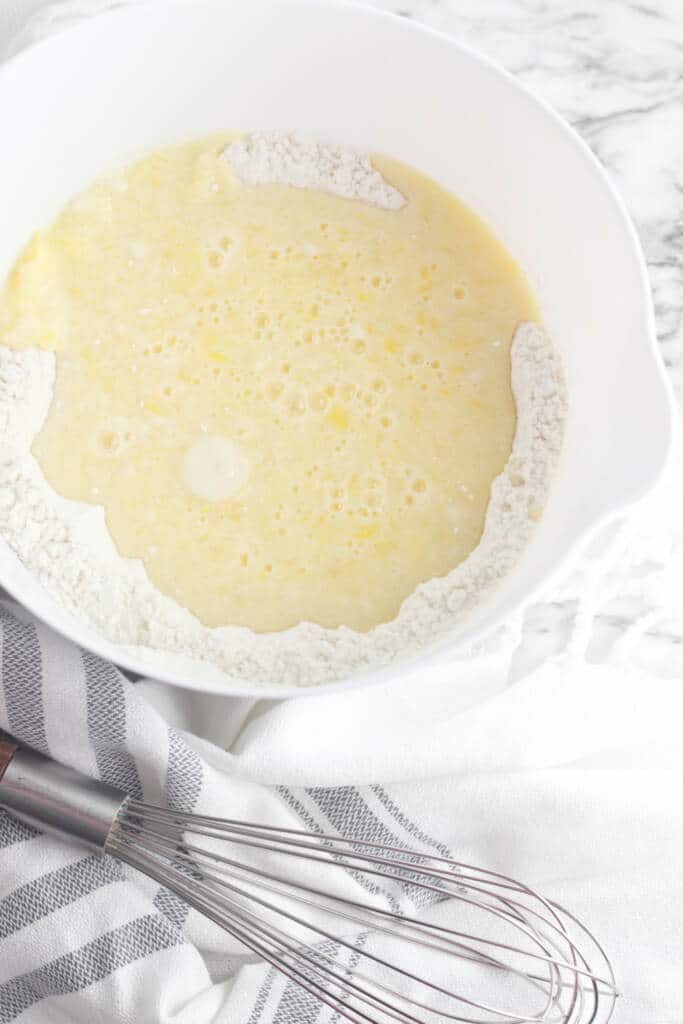
STEP FOUR: Make a well in the dry ingredients and add the wet ingredients to the bowl. Use a spoon to stir the ingredients together, being careful not to over-mix. The batter will be lumpy.
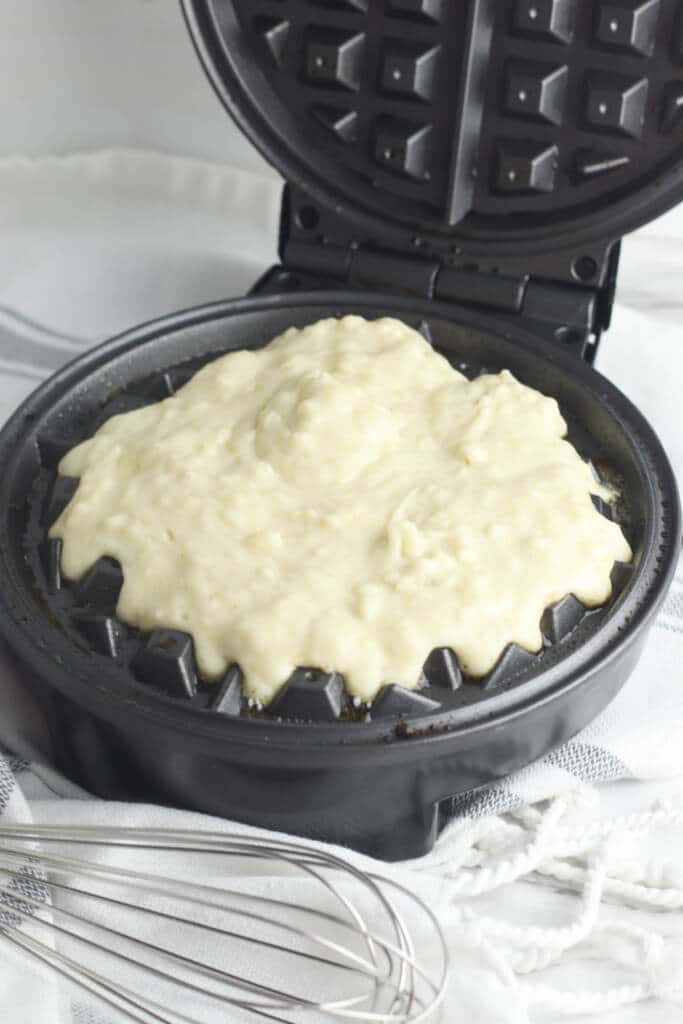
STEP FIVE: When the waffle iron is heated, spray the top and bottom with nonstick cooking spray. Spread the batter over the bottom of the waffle iron, starting in the center and working your way out until the plate is 2/3 of the way covered.
STEP SIX: Close the lid and cook the waffle for 5 to 7 minutes. The waffle is ready when the iron stops steaming.
STEP SEVEN: Continue cooking until all the batter has been used.
Smart Cooking Tips
Allow your waffle maker to heat up before pouring on the batter.
Cook the waffles for around 5 minutes. Once there is no longer steam coming from the waffle maker, the waffles are ready to be removed. Cooking any longer will make them much crispier, but can often dry them out too.
If you’re not going to enjoy your waffle straight out of the waffle maker place, them on a parchment-lined baking sheet and put them in a preheated oven to 200°F and keep them warm.
These Gluten-Free Belgian Waffles can be frozen and reheated. Store in a freezer-safe bag or container for up to 3-4 months. We have made them a few ways, but the kids prefer to place them in the microwave for just a minute. The adults like to bake them in the oven on a baking sheet at 350 degrees for 10 minutes or until warm throughout.
Other Great Gluten-Free Recipes
Delicious Organic Guacamole Recipe With Hard Boiled Eggs
Summertime Watermelon Salad Recipe
Brown Butter & Maple Sweet Potato Hasselback Recipe
Gluten Free Homemade Belgian Waffles Recipe
These Gluten-free homemade Belgian waffles are just like you would expect from regular waffles. They are soft and chewy on the inside and have an amazing flavor.
Ingredients
- 2 cups gluten-free baking flour
- ¼ cup sugar
- 4 teaspoons baking soda
- ½ teaspoon salt
- 1 ½ cups milk
- 2 eggs
- 1 teaspoon vanilla extract
- 6 tablespoons butter, melted and cooled slightly
- Non-stick cooking spray
Instructions
- Preheat the waffle iron.
- In a large bowl, whisk together the gluten-free baking flour, sugar, baking soda, and salt. Set aside.
- In a separate bowl, beat together the milk and eggs. Add the vanilla extract and melted butter and mix to combine.
- Make a well in the dry ingredients and add the wet ingredients to the bowl. Use a spoon to stir the ingredients together, being careful not to over mix. The batter will be lumpy.
- When the waffle iron is heated, spray the top and bottom with nonstick cooking spray. Spread the batter over the bottom of the waffle iron, starting in the center and working your way out until the plate is 2/3 of the way covered.
- Close the lid and cook the waffle for 5 to 7 minutes. The waffle is ready when the iron stops steaming.
- Continue cooking until all the batter has been used.
Nutrition Information:
Yield:
5Serving Size:
1Amount Per Serving: Calories: 411Total Fat: 18gSaturated Fat: 10gTrans Fat: 1gUnsaturated Fat: 6gCholesterol: 117mgSodium: 1396mgCarbohydrates: 52gFiber: 1gSugar: 10gProtein: 10g
This post may contain affiliate links or sponsored content. Disclosure Policy


4 Comments