
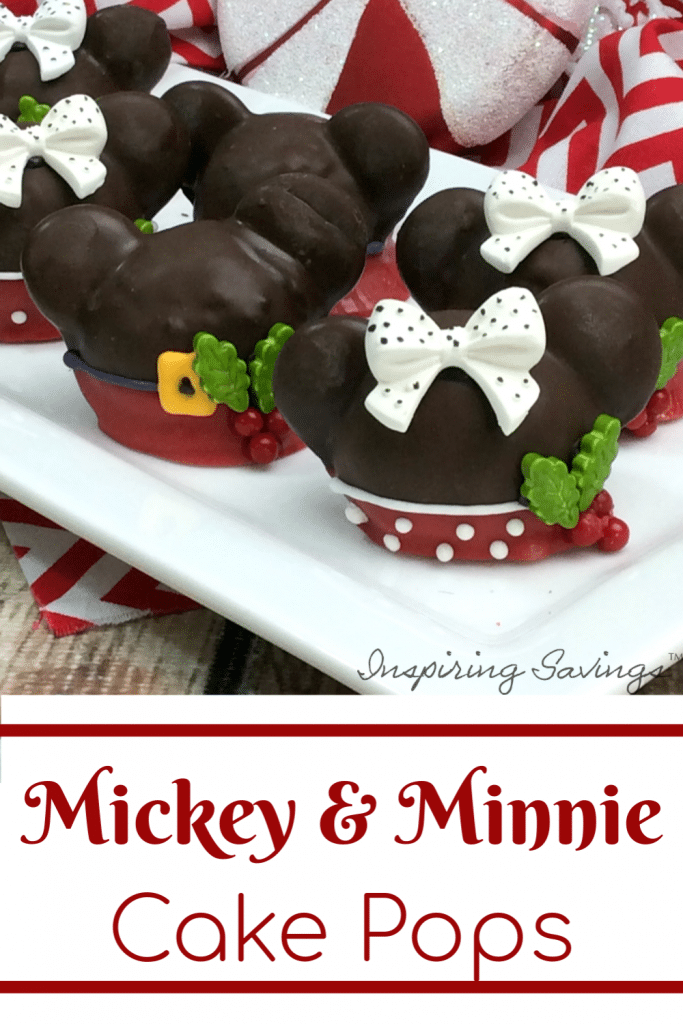
Disney Inspired Christmas Cake Balls
⭐️⭐️⭐️⭐️⭐️This recipe has been developed and tested by me and my family; it is not generated by AI.
Hosting a Disney-Inspired Christmas Party. You can create these beautifully creative Christmas Mickey and Minnie Mouse Cake balls with step-by-step instructions.
Disney Inspired Christmas Cake Balls
| Prep Time: 15 Minutes Cook Time: 25 Minutes Additional Time: 30 Minutes Total Time: 1 Hour, 10 Minutes Servings: 15 Cake Pops |
There is no denying it. Disney ANYTHING just brightens up any season. Turn ordinary cake pops into spectacular Christmas Mickey and Minnie Mouse Cake Balls. They’re perfect for party guests who don’t want a whole piece of cake or those who want a little more than a piece of cake.
Cake balls or pops also make a wonderful party favor, tucked into a clear bag or wrapped in clear vellum and tied with a ribbon. They’re just too pretty to hide in anything else. Your party guests will love them!
Ingredients needed
Please note that you will find a printable instructions list below that includes all the ingredients and steps to make your own Christmas Mickey and Minnie Mouse Cake Balls.
- Betty Crocker Chocolate Cake Mix
- Oil
- Eggs
- Ghirardelli milk chocolate melting wafers
- Chocolate frosting
- Red candy melts
- White cookie icing
- Black cookie icing
- Yellow cookie icing
- Candy Bow’s royal icing transfers
- Holly sprinkles
How To Make Your Disney Cake Balls
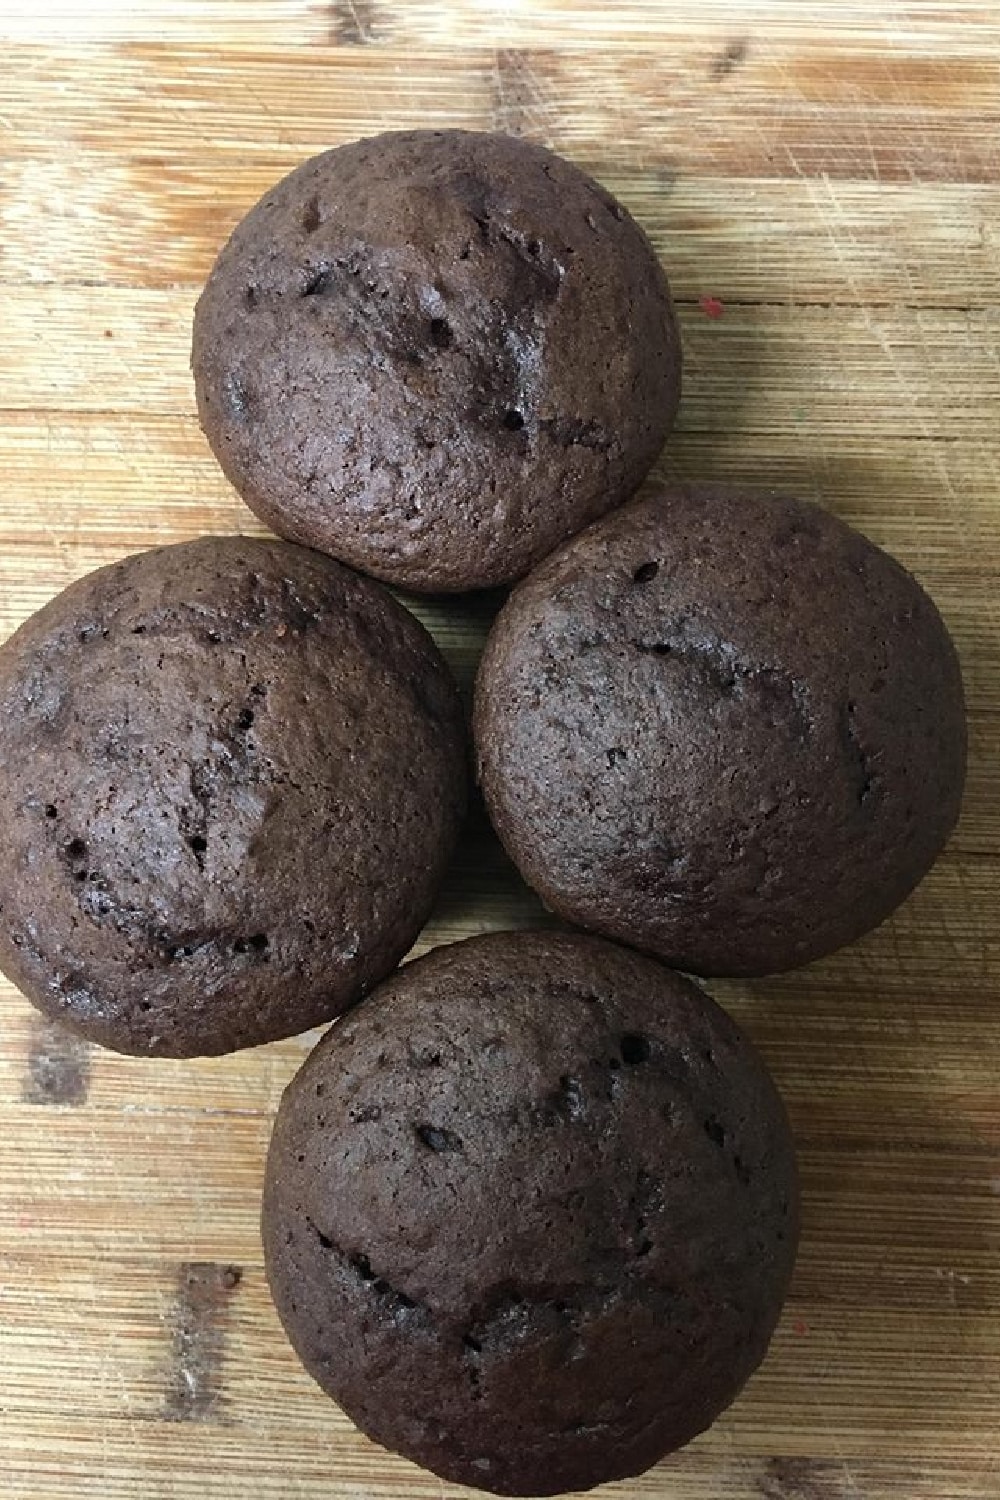
STEP ONE: Begin by preheating your oven to 350 degrees. Next, following directions on the back of the cake box, prepare cupcakes as directed.
STEP TWO: Once baked, place the cupcakes on a wire rack to cool for 5 minutes. Then remove the cupcakes from the pan and cool completely.
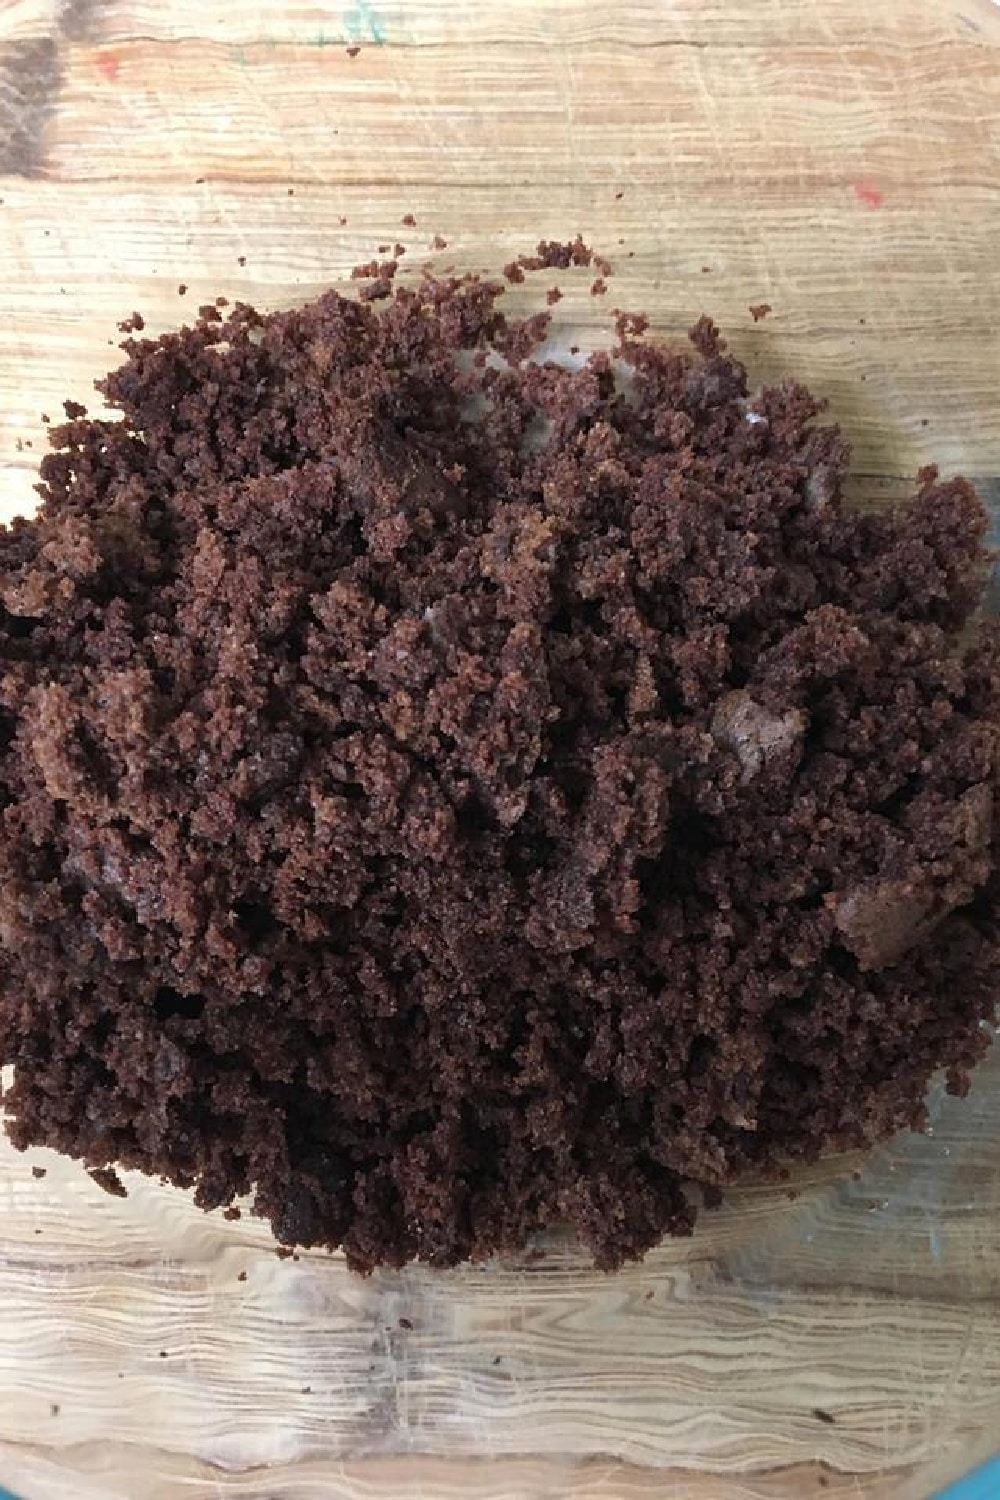
STEP THREE: Once it is completely cooled, using your hands break apart the cupcakes and roll each piece in between your hands. Make sure that the cupcake breaks down into really fine pieces.
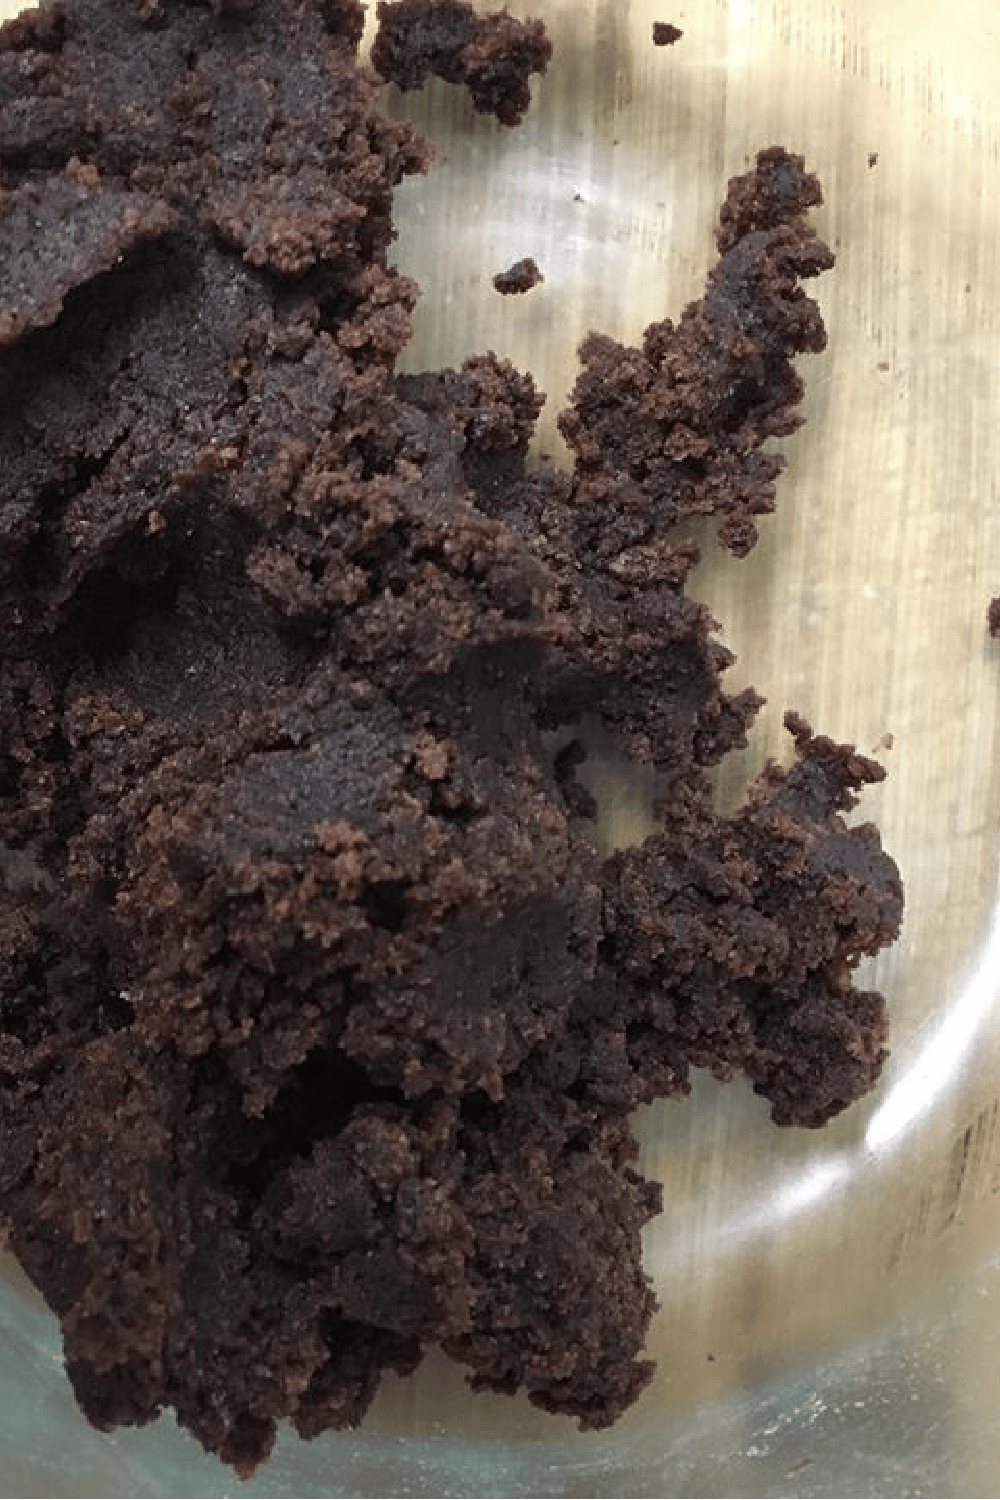
STEP FOUR: Then add the frosting and mix well. Your cupcake mixture should resemble a cookie dough texture.
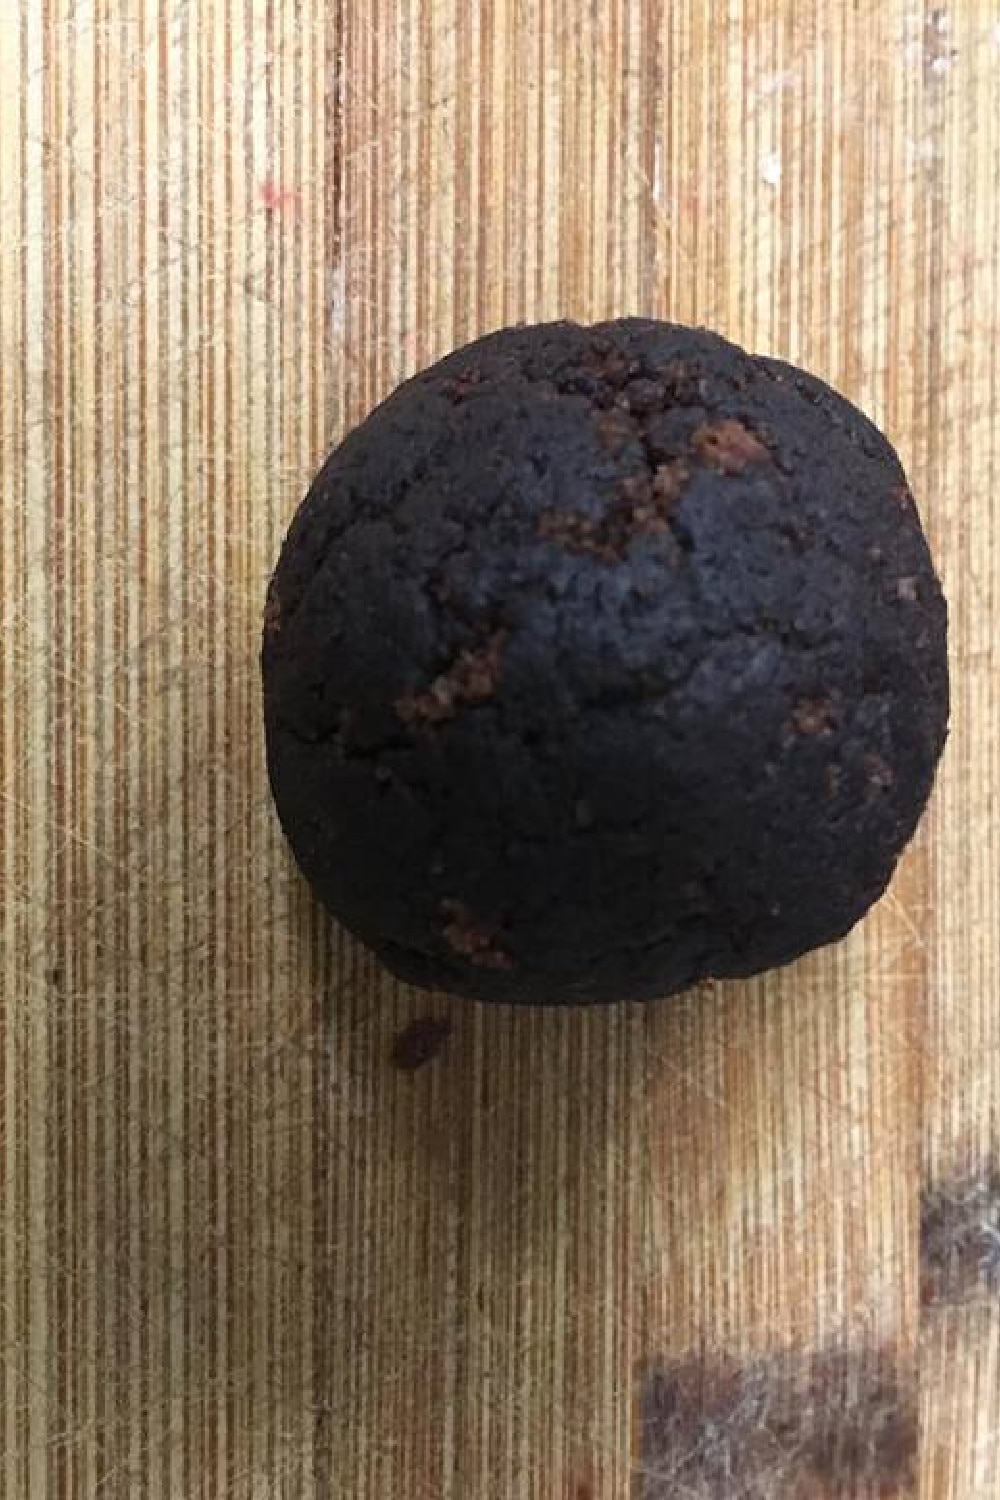
STEP FIVE: Next, using a small ice cream scoop or a tablespoon, scoop the mixture into your hands and roll it into 1-inch balls.
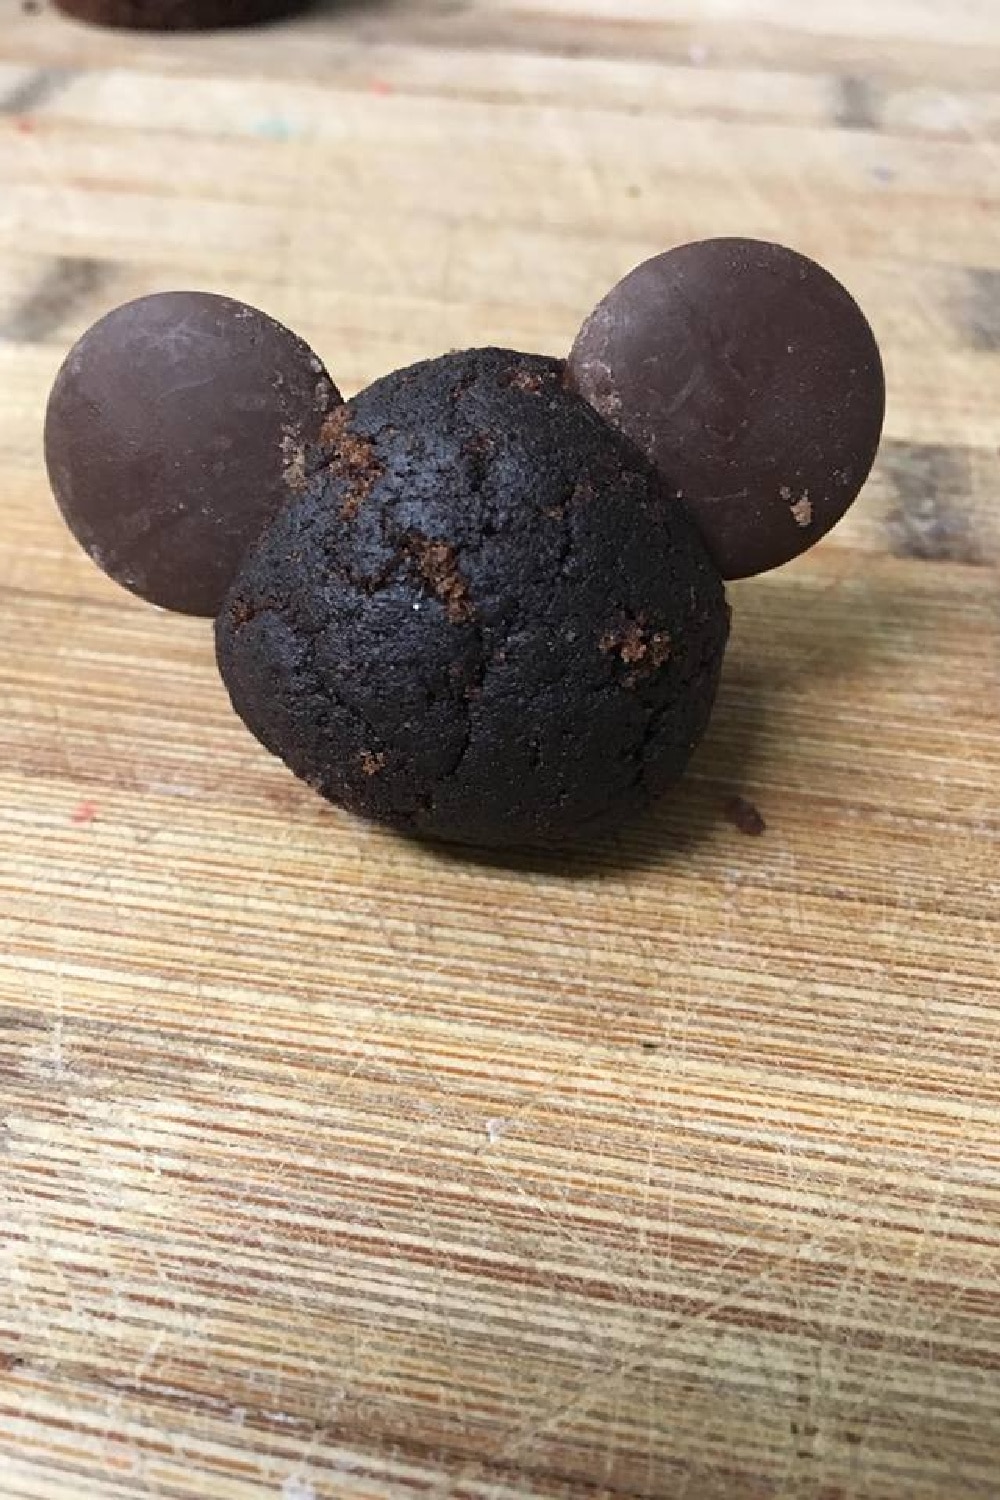
STEP SIX: You are going to want to pair up 2 Ghirardelli Chocolate wafers with each cake ball for the ears. Add a wafer into each corner of the cake balls where the ears would go. Repeat the steps with the remaining cupcakes and chocolate wafers. Place them onto a cookie sheet fitted with parchment paper.
STEP SEVEN: When done, place it into the freezer overnight. Once you are ready, use a double boiler, and melt the second bag of milk chocolate wafers. When the chocolate is melted, take the cake balls out of the freezer.

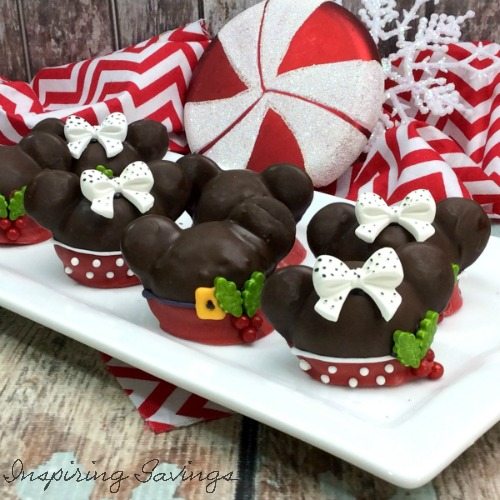
Now it is time to dress up your Christmas Mickey and Minnie Cake balls by dipping them in chocolate and adding in some accessories. First, you will want to dip the top half of the cake ball into the chocolate.
Make sure that the ears and the top half of the cake ball get coated. Lightly shake off excess chocolate and place it back onto the cookie sheet Repeat steps with the rest of the cake balls.
Continue the next steps with the directions listed below. Red chocolate is the next step to adding flare. They may seem like a lot of work, but to a true Disney fan, all these steps will be well worth it.
You can even add a stick to the bottom of these adorable balls and turn them into pops.
How To Store Your Mickey and Minnie Mouse Cake Balls
Place your cake balls single layer in an airtight container. Cake pops can be stored in your refrigerator for up to one week or freezer for up to one month. If your pops are frozen, place them in the refrigerator to soften.
Other Fun Seasonal Recipes
Classic Gingerbread House Cookie Mix Recipe – Includes Template
Easy No-Bake Peppermint Dipped Cookies
Red Velvet White Chocolate Chip Cookies Recipe
Salty Sweet Oatmeal Pretzel Cookies
Disney Christmas Cake Balls Recipe
Hosting a Disney Inspired Christmas Party. You can create these beautifully creative Christmas Mickey and Minnie Mouse Cake balls with step by step instructions. What a fun Disney treat! These Chocolate Dipped Mickey Mouse cake balls can be made at home!
Ingredients
- 1 box of Betty Crocker Chocolate Cake Mix
- 1 cup water
- 1/2 cup oil
- 3 eggs
- 2 packages of Ghirardelli milk chocolate melting wafers
- 1 container of chocolate frosting
- 1 package of red candy melts
- 1 tube of white cookie icing
- 1 tube of black cookie icing
- 1 tube of yellow cookie icing
- 1 package of bow's royal icing transfers
- 1 container of Wilton holly melody sprinkles
- 1 cookie sheet fitted with parchment paper
- 1 cupcake pan fitted with cupcake liners
Instructions
- Preheat oven to 350 degrees. Following directions on the back of the cake box, prepare cupcakes as directed.
- Once baked, place onto a wire rack to cool for 5 minutes. Remove cupcakes from pan and cool completely.
- In a large bowl, using your hands and 5 cupcakes at a time, crumble cake into fine crumbs. Mix in 1 1/2 spoonful of frosting until combined. Your cupcake mixture should resemble cookie dough texture.
- Next using a small ice cream scoop or a tablespoon, scoop mixture into your hands and roll into a 1 inch balls.
- Then pair up 2 Ghirardelli Chocolate wafers with each cake ball for the ears. Place a wafer into each corner of the cake balls where ears would go. Repeat steps with remaining cupcakes and chocolate wafers. Place them onto a cookie sheet fitted with the parchment paper. Once done, place into the freezer for overnight.
- Using a double boiler, melt the second bag of milk chocolate wafers. When chocolate of melted, take cake balls out of the freezer. Carefully peel off a cake ball off the parchment paper
- Next, dip the top half of the cake ball into the chocolate. Making sure that the ears and the top half of the cake ball get coated. Lightly shake off excess chocolate and place back onto the cookie sheet Repeat steps with rest of the cake balls
- Once all have been dipped, time to melt the red candy melts. Once melted, carefully dip the bottom half of the cake balls into the chocolate. Again, lightly shake off any excess chocolate and place onto the cookie sheet.
- After all cake pops have been dipped into the chocolate, let sit for an hour to harden.
- Once harden, split the cake balls in half so that you have half mickey and half Minnie. Or however many of each you would like.
- Using the black cookie icing, pipe on a black belt into the middle of the red. Using the yellow cookie icing, pipe on a yellow square for the buckle. The carefully using tweezers, place two holly leaves and 3 red sprinkles for the berries on the corner of the yellow buckle. Mickey is complete.
- For Minnie using the white cookie icing, pipe on a line and polka dots for her dress. Pipe a dollop onto the back of a bow icing transfer and place in the middle in between the ears for Minnie's bow. Then using tweezers, carefully place two holly leaves and 3 red sprinkles for the berries on the corner of the dress. Let dry for an hour
Nutrition Information:
Yield:
15Serving Size:
1Amount Per Serving: Calories: 253Total Fat: 17gSaturated Fat: 4gTrans Fat: 0gUnsaturated Fat: 12gCholesterol: 40mgSodium: 122mgCarbohydrates: 25gFiber: 1gSugar: 18gProtein: 3g
This post may contain affiliate links or sponsored content. Disclosure Policy


Wow Jen! I had to pinned this, they are so adorable!
Yippie!!! Thanks so Much Diana!!! They came out better than expected