
DIY Tissue Paper Christmas Nativity Craft For Kids
This simple and easy tissue paper Christmas nativity craft is perfect for kids. Learn about the true meaning of Christmas. Comes with a free template.
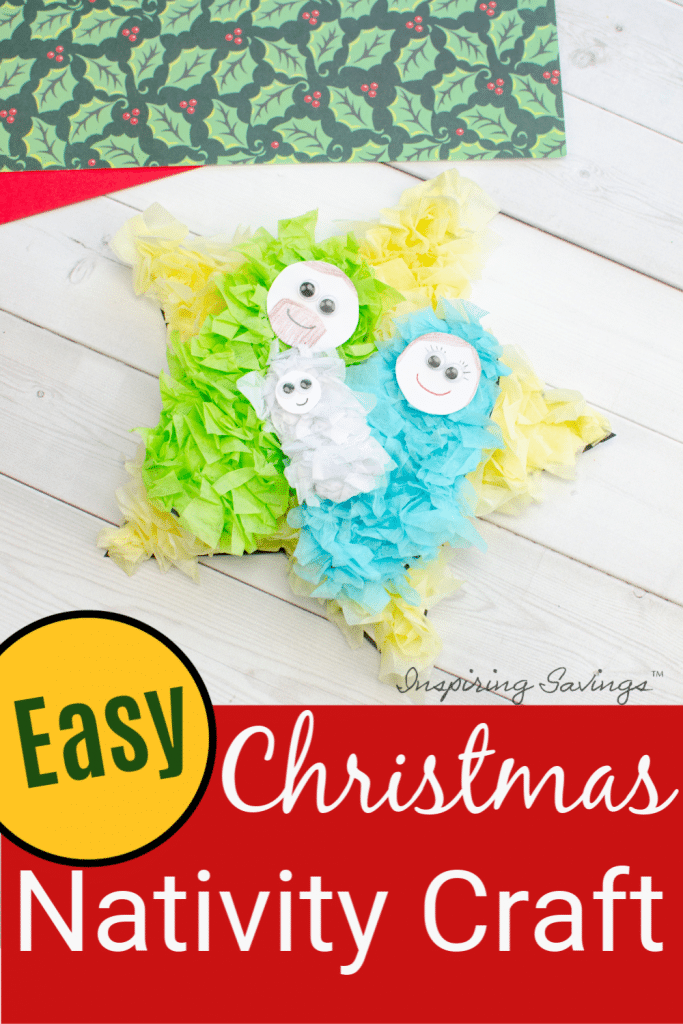
This DIY Tissue Paper Christmas Nativity Craft is one of our favorites to make this year. It isn’t hard at all, yet it looks so intricate. I love centering our Christmas decor around Christ, and this craft is perfect for that!
Plus, we get to craft and openly share about Jesus and his birth with our kids. We purchased an amazing Children’s bible when the kids were much younger. They each have their own. I highly recommend it. I put the link right below in case you want to check it out for yourselves. Or you can read the story from here.
This craft doesn’t require a lot of crafting items. You may even possibly have all the supplies on hand. Which would be great! No need to run out to the store and purchase.
DIY Tissue Paper Christmas Nativity Craft Idea For Kids
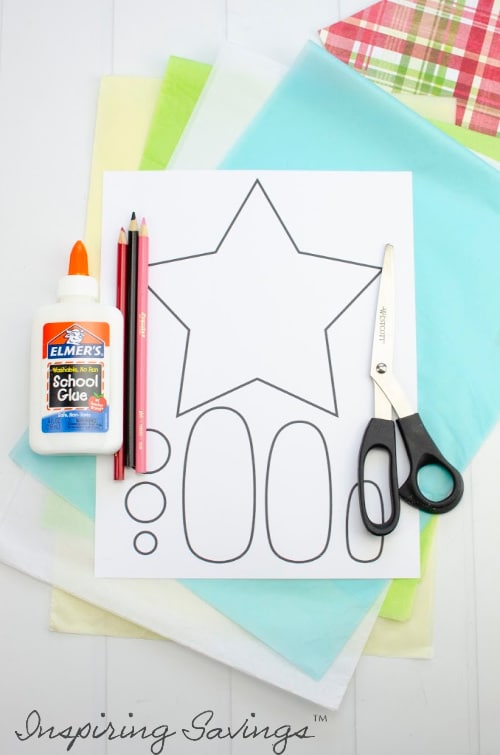
Supplies Needed Christmas Nativity
- Printable Nativity Template
- Template printed on cardstock
- Scissors
- Colored pencils: black, red, pink, brown
- All-purpose glue
- Tissue paper: yellow, blue, green, and white
- Optional: small googly eyes
DIRECTIONS TO MAKE THE NATIVITY CRAFT:
Before you get started, make sure you gather all your supplies. With a nativity craft such as this one, it’ll make it much easier when you aren’t running around for your supplies.
Make sure to have your nativity cut-out template –downloaded and printed too!
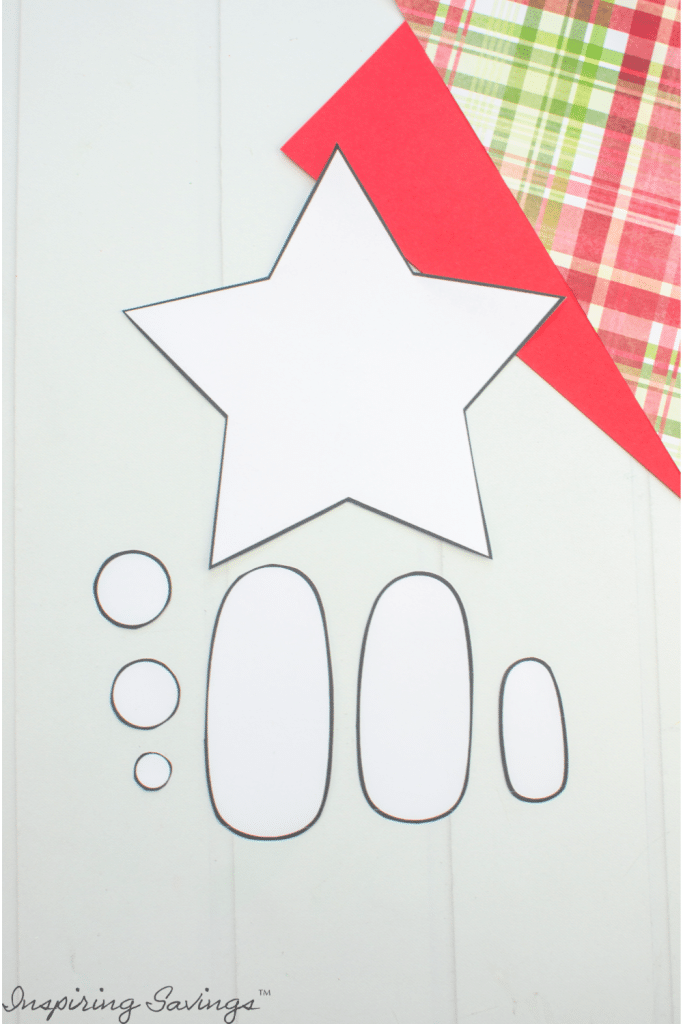
Now that you have your supplies, you are ready to begin. First, start by cutting out all the pieces needed on your printed template.
This is where you will be handing over those safety scissors and allowing your kids to go to work. The great thing about this project is even though they may cut the edges all wonky and shredded-looking, it doesn’t matter. The tissue paper will cover that all up.
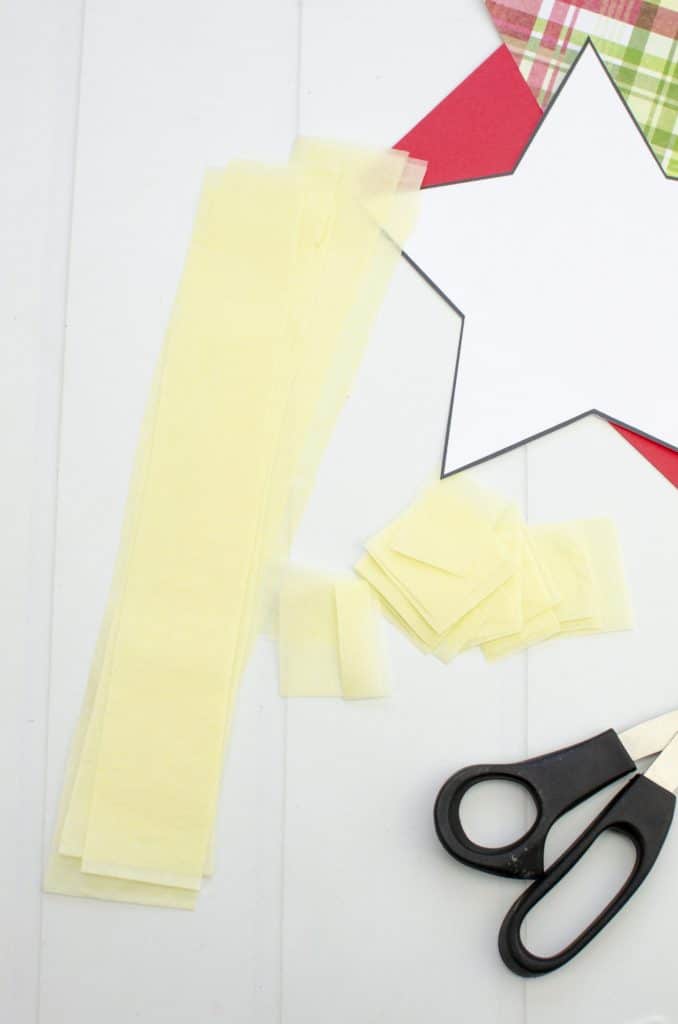
First, cut the tissue paper into small pieces. To make this step easier for the kids, adults can cut the tissue paper into strips first, then the kids can cut from there. The kids will surely love to sit and make a mess with crinkly tissue paper.
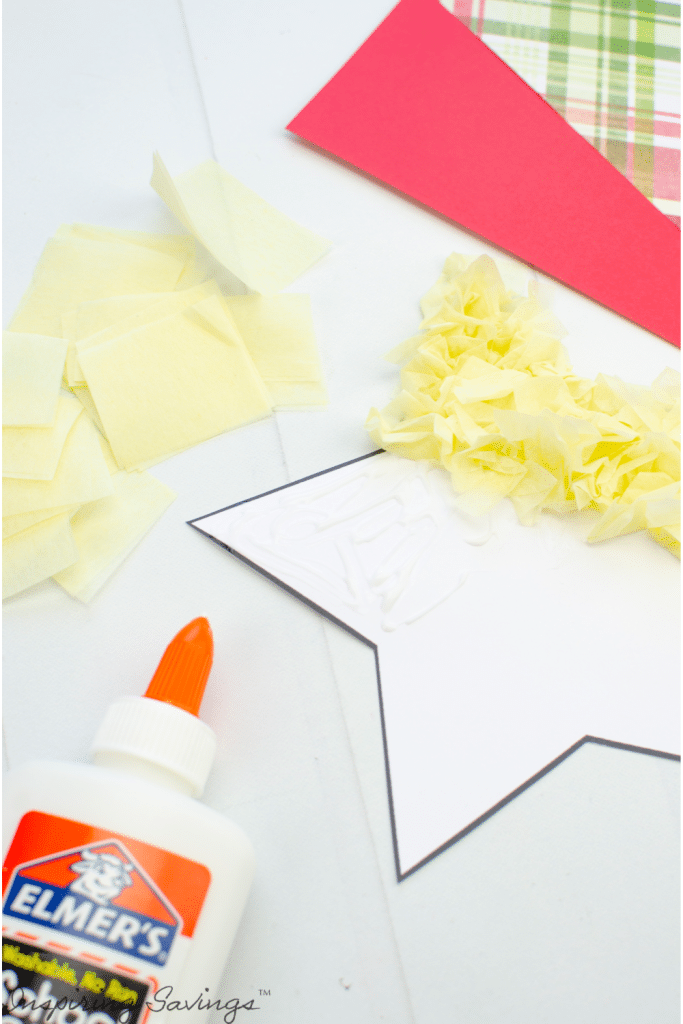
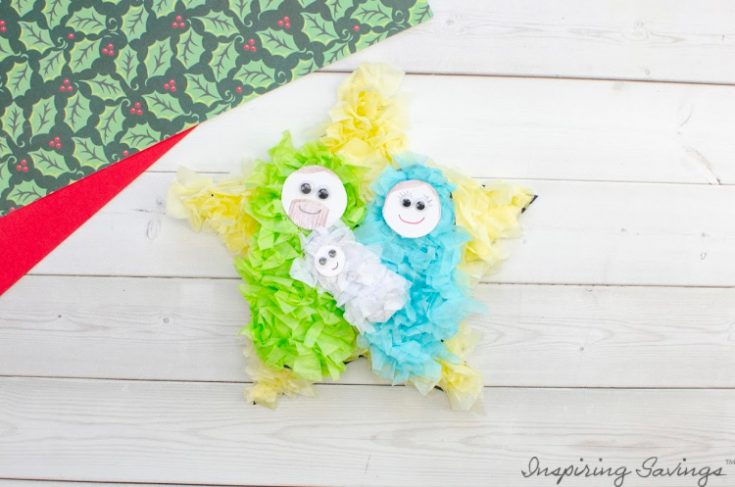
Next, you will want to take the star template and cover a section with glue. Crumple up a piece of tissue paper and stick it down.
Repeat over and over until the whole star is covered.

Now you will want to repeat this process with the green, blue and white tissue paper. Glue the green to the largest oval, the blue to the middle-sized oval, and white for the smallest.
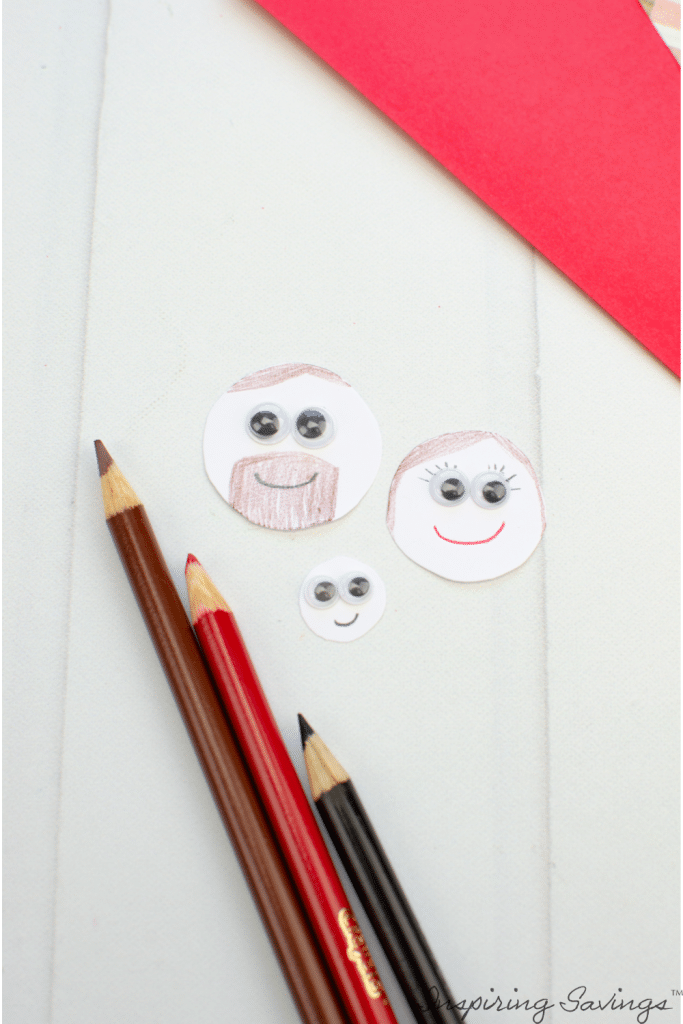
Now, you will want to grab those colored pencils. Let’s get started drawing faces onto the circles. You can draw on your eyes or use googly eyes. Either way, they will look super cute.
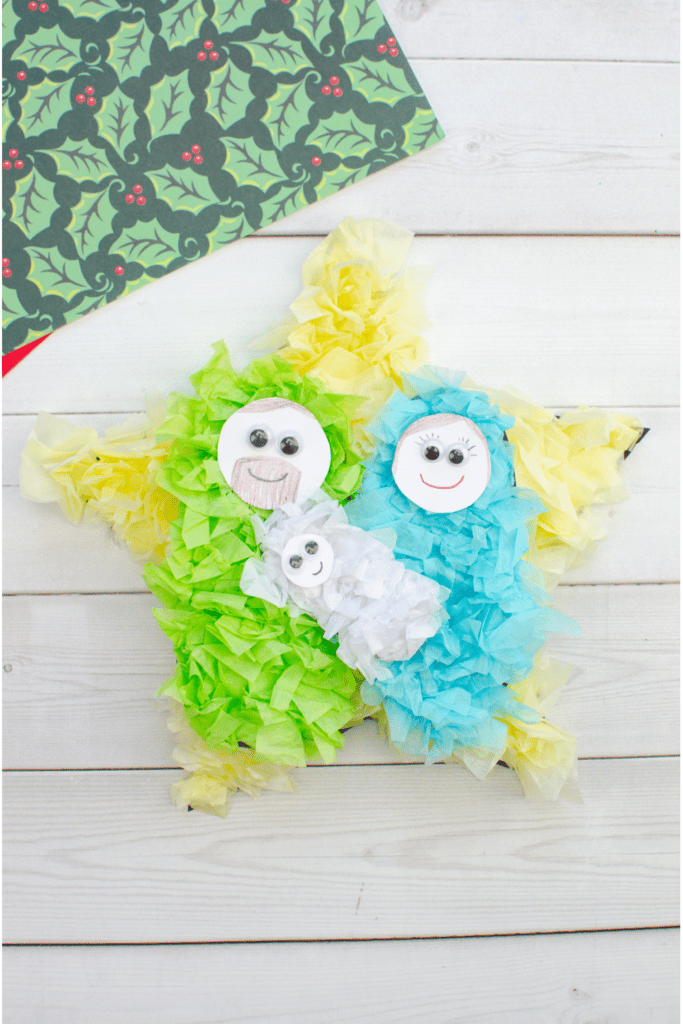
Next, it is time to glue the faces onto your tissue paper ovals.
Additional Crafty Tip Ideas For This Project
- Using a hole puncher, create a small hole at the top. Add a ribbon tie and hang it from your Christmas tree or child’s doorknob to their room.
- You can also take a few of those mailed spam magnets that you get in the mail and glue them to the back of the star. Adding it to your fridge.
Other Amazing Christmas-Themed Ideas
Christmas Mickey & Minnie Cake Balls
Classic Gingerbread House Cookie Mix Recipe – Includes Template
Incredibly Easy: Holiday Tradition – How to Make Reindeer Food!
Homemade Wood Snowman Hat Ornaments Craft
DIY Tissue Paper Christmas Nativity Craft For Kids
This simple and easy DIY Tissue paper Christmas Nativity craft is perfect for kids. Perfect craft to do at home or at Pre-School. Learn about the true meaning of Christmas with baby Jesus, Mother Mary & Joseph. Comes with a free template.
Materials
- Template printed on cardstock
- Colored pencils: black, red, pink, brown…
- All-purpose glue
- Tissue paper: yellow, blue, green and white
- Optional: google eyes
Tools
- Scissors
Instructions
- To begin, print the template on cardstock and cut out all the pieces.
- Let’s start with the yellow first. Cut the tissue paper in small pieces. To make this step easier for the kids, adults can cut the tissue paper in strips first, then the kids can cut from there.
- Take the star template and cover a section in glue. Crumple up a piece of tissue paper and stick it down. Repeat over and over until the whole star is covered.
- Repeat this process with the green, blue and white tissue paper. Glue the green to the largest oval, the blue to the middle-sized oval and white for the smallest.
- Glue the oval shapes to the star.
- Then grab the colored pencil and draw a face onto the circles. You can draw on eyes or use google eyes.
- Finally, glue the faces on & the craft is complete!
This post may contain affiliate links or sponsored content. Disclosure Policy


Great craft idea! I love how this DIY Tissue Paper Christmas Nativity introduces kids to the true meaning of Christmas through creativity and art. It’s a wonderful way to engage children and teach them about baby Jesus, Mother Mary, and Joseph. The simplicity of the craft makes it accessible for even the little ones. Thank you for sharing this brilliant idea! – Emily