
DIY Fall Candle Centerpiece Idea
A beautiful homemade fall centerpiece is the perfect way to celebrate the season and any DIYer’s dream. Make a beautiful fall centerpiece for your home.
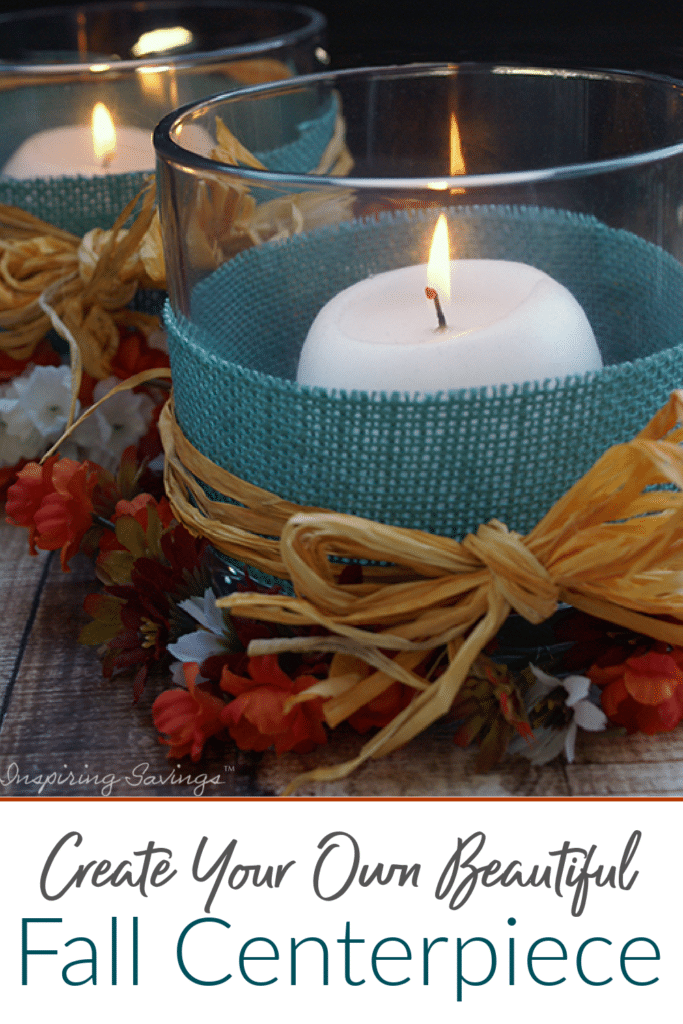
My crafty friends, it is time to fire up your hot glue gun and dust off those crafting supplies. Celebrate the season with a beautiful centerpiece. Just like you, I enjoy decorating for fall and sprinkling the scent of pumpkin spice in the air.
This year, I made this super simple Homemade Fall Centerpiece with all my favorite colors.
You can pick and choose your colors to customize your centerpiece to match your current home decor. I got my inspiration from nearly passing out at my local home decor store. You heard that right!
After spending some time drooling over the gorgeous fall pieces, I realized that they were simple to make with a few supplies. I could easily have the same look paying a fraction of the price.
DIY Fall Candle Centerpiece Idea
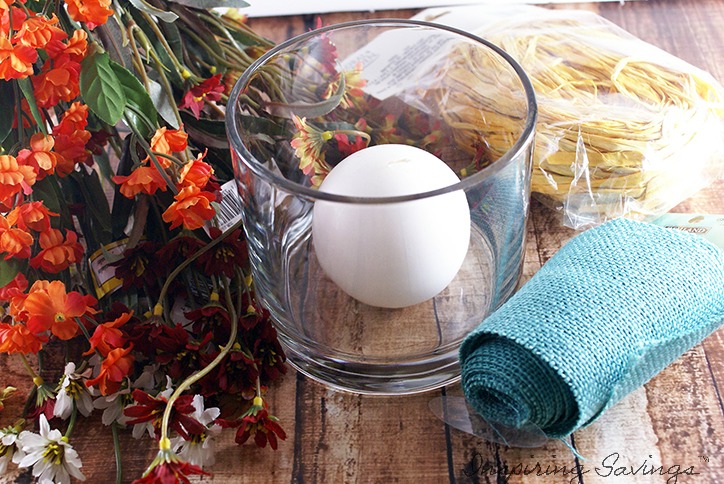
Materials Needed to Make a Fall Centerpiece
- A mixture of fall-themed flowers & white flowers, preferably one with smaller flower heads on them, as shown in the photo. You will need approximately 5 bunches of flowers for one centerpiece flower ring.
- Bag of yellow raffia
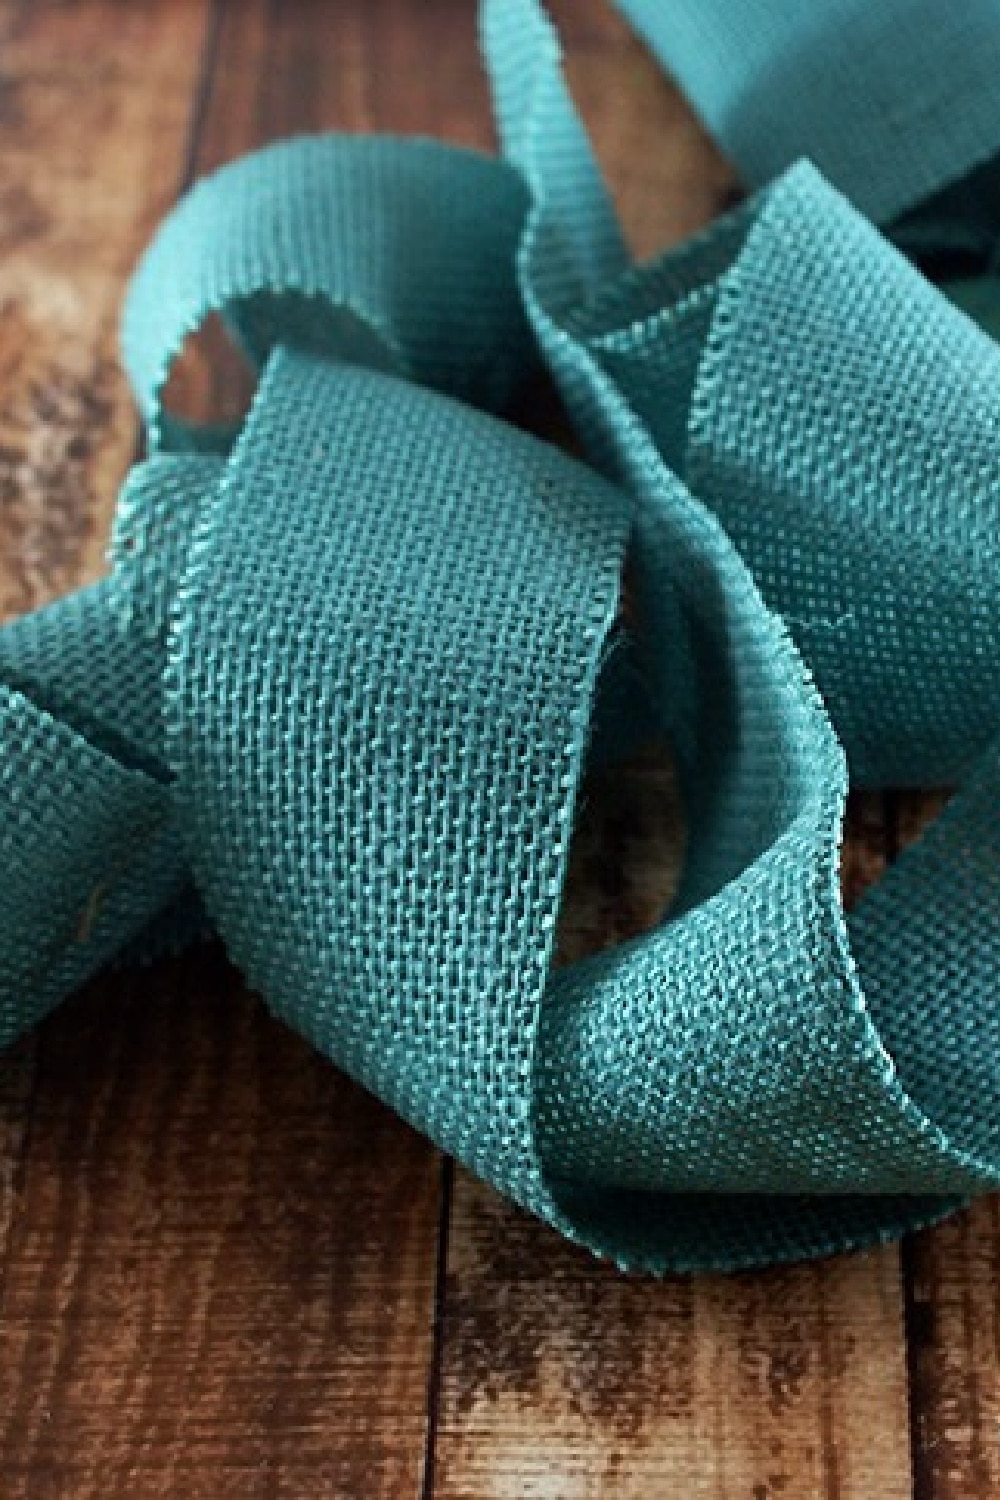
- 1 Roll of Ashland burlap roll – wide (4″) I used a Teal color, but any color would be great!
- Hot glue gun
- Glue stick
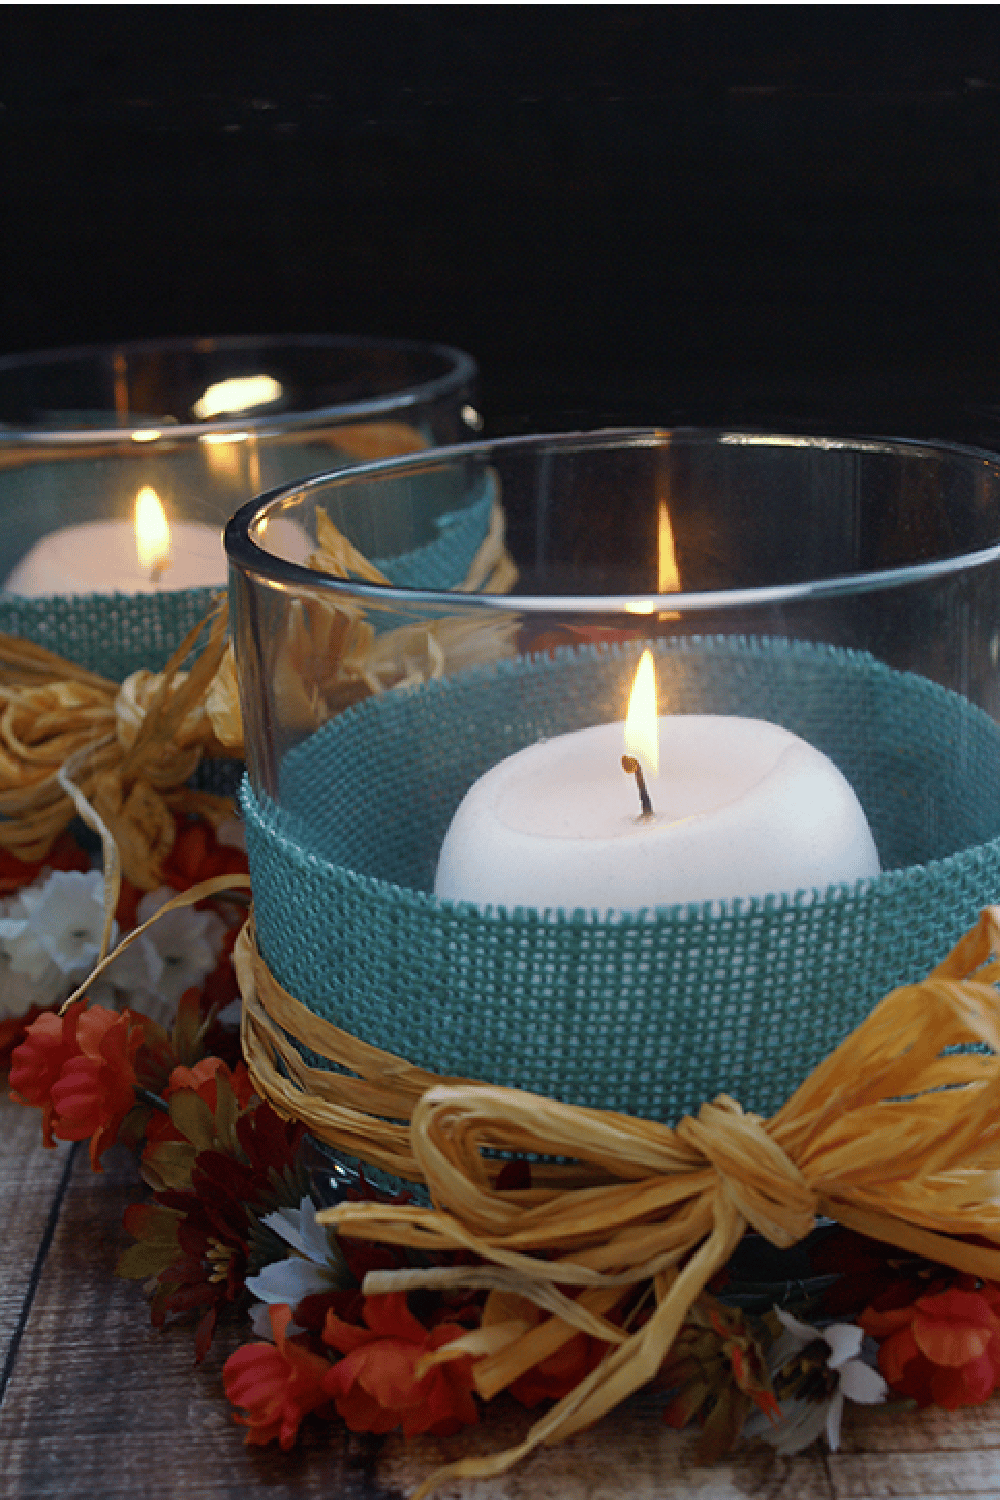
- 1 round ball-shaped candle
- Libbey 4 1/2 Cylinder glass vase
- Roll of 32 Gauge beading wire
- A pair of wire cutters
How to Make a Homemade Fall Centerpiece
First, cut the roll of burlap down the middle lengthwise to create proportion-sized widths. Measure around your glass vase (you can use any glass vase you wish!) with the burlap. Add an extra 1 inch on cutting your strip. You will need a little overlap to use with the hot glue gun.
To make life easy, use a pencil to make your mark on the burlap where you want to cut the burlap.
Now, with your wire cutters, cut off the flower stems from the main grouping of flowers. Try to leave at least a 1 1/2″ – 2″ (tops!) stem area. Fewer stems will help remove extra bulk.

Once done cutting the flowers, it’s now time to join them together! Grab 3 different varieties of colored flowers. With wire cutters, cut a 24″ piece of beading wire for the starting process. Wrap the wire tightly around the stems of the grouping of flowers (at least 6 – 7 times).
Then, by alternating your colored flowers, add a grouping of two flowers beneath your beginning bunch.
Crafting Tips for this project
Make sure that the flowers are pretty flush against the starting point. You don’t want to see a ton of greenage from the stems. The more flowers, the better it looks visually! Make sure you wrap the wire twice around.
Now, continue this pattern until you have enough length to wrap around the base of your glass vase. You will need to add wire along the way to add more flowers.
Your flowers will be locked into place! You want the flower wreath to be slightly loose-fitting at the base.
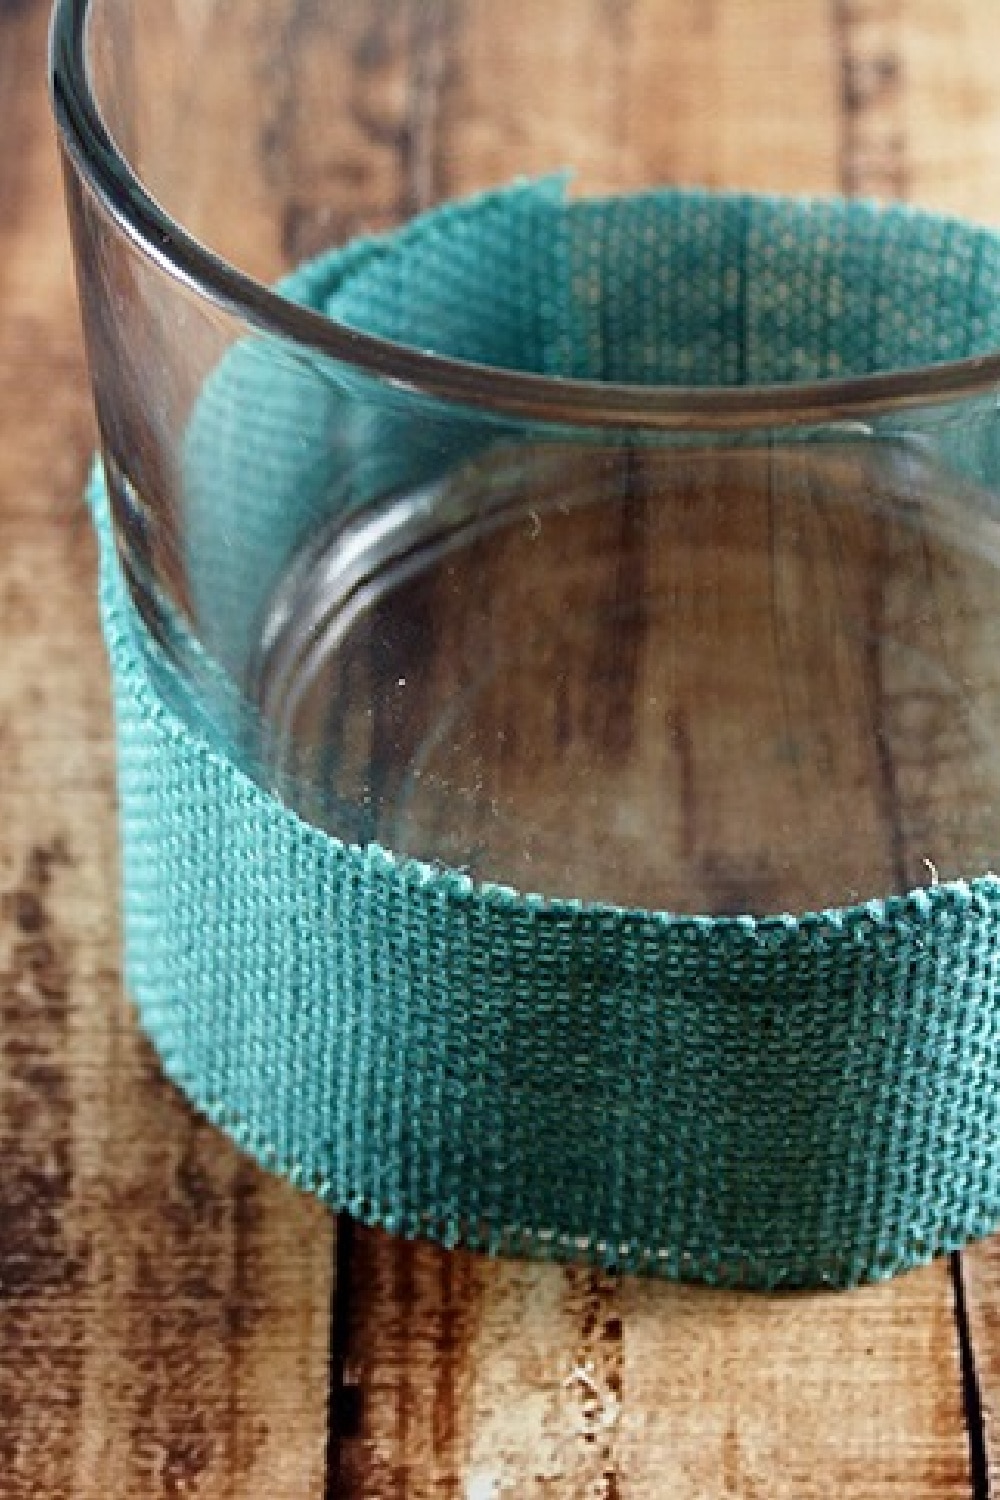
Now, with a hot glue gun, tack burlap into place around the glass vase. You don’t necessarily have to glue the burlap to the vase itself. I didn’t because I changed it up seasonally with different colors.
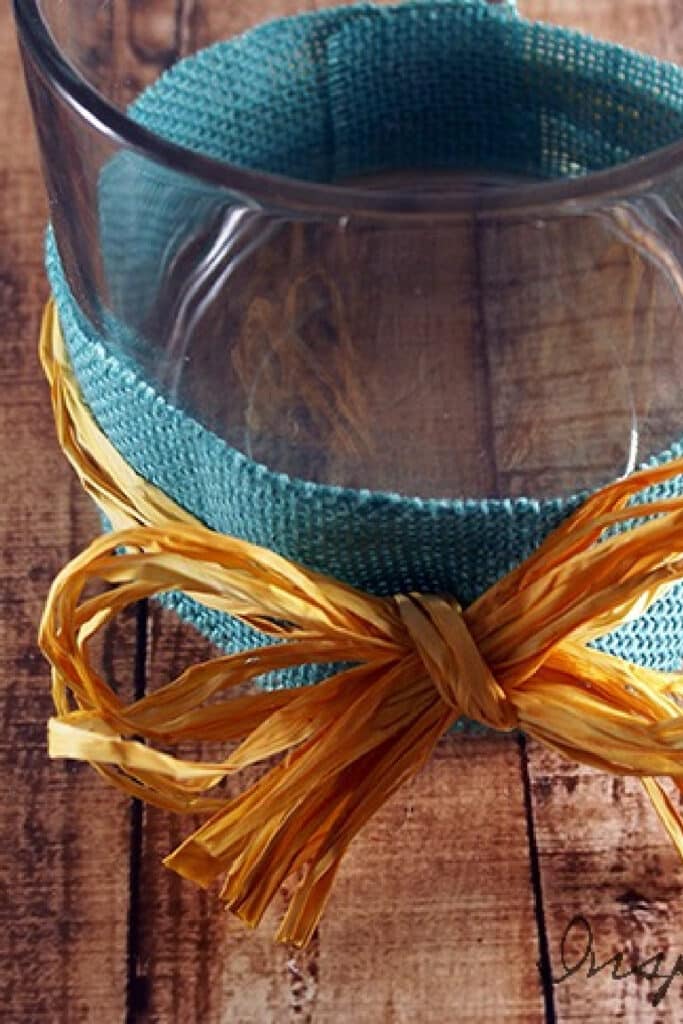
Then take three to four strands of raffia, wrapping them around the middle of the burlap ribbon on your vase, and tie it in a bow. Viola!
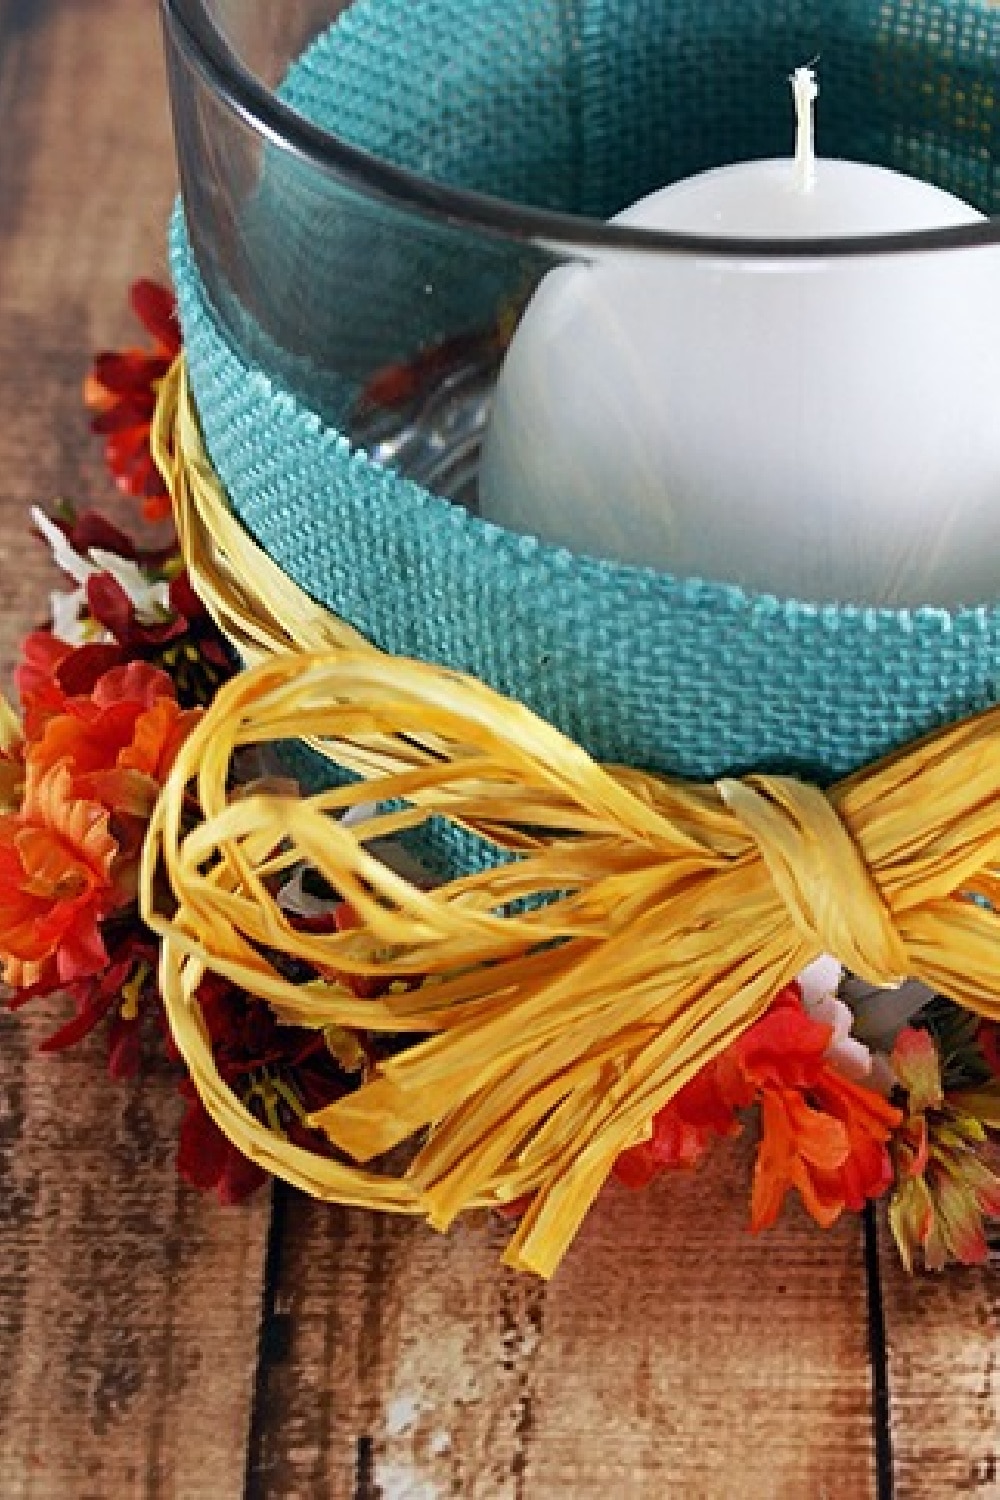
Time to put the finishing touches on your piece. Place the vase into your flower ring, add your choice of candles inside the glass holder, and you’re all done!
Other Fall-Inspired Articles
Fall Craft: Leaf 3D Glitter Drawings
Homemade Fall Decoration: Altered Wood Block Letters
Creative Crafts With Fall Leaves For Kids
This post may contain affiliate links or sponsored content. Disclosure Policy

2 Comments