
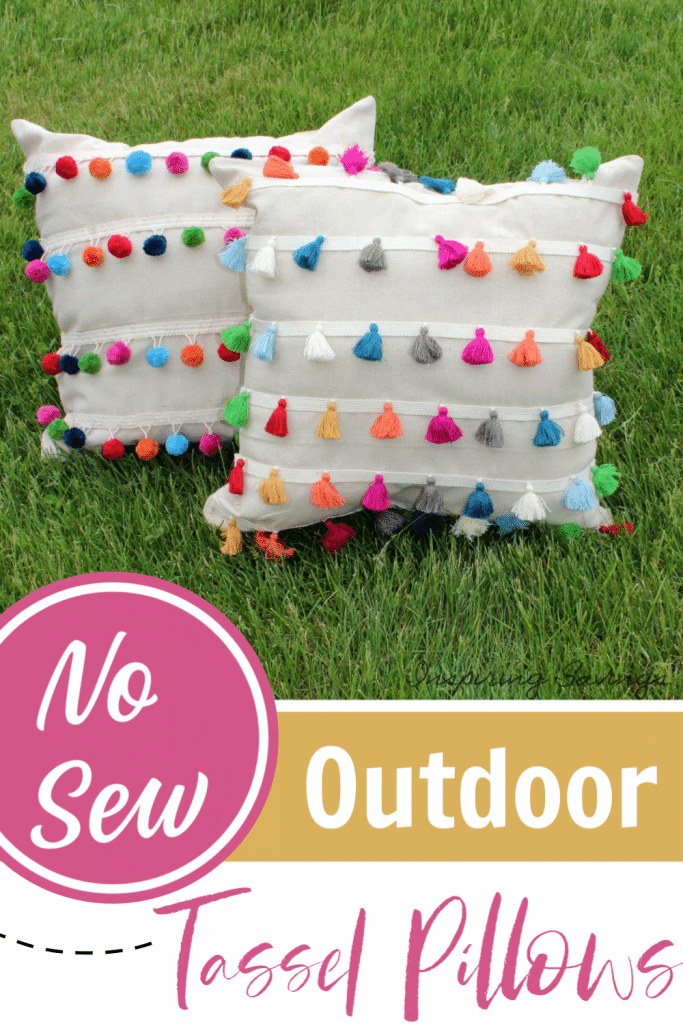
DIY No Sew Outdoor Tassel Pillows
Transform your outdoor space with our DIY No Sew Outdoor Tassel Pillows! This easy, fun project requires no sewing skills and is perfect for adding a pop of color and style to your patio or garden. Follow our step-by-step guide to create unique, trendy pillows using simple materials. Perfect for both beginners and seasoned crafters, learn how to customize your outdoor decor effortlessly with these charming tassel pillows!
DIY No Sew Outdoor Tassel Pillows
On a budget, but would love your porch or outdoor deck to pop with color this summer? You’ve come to the right place! I have always had a weakness for brightly colored outdoor items. Bright colors shout the words, “Summertime is here”.
Pillows make spaces fun. They add so much personality to the different rooms of our homes, but sometimes they get overlooked as an outdoor addition because we can get a little nervous about making pillows outdoors.
Here is a 6-step project to make yourself some beautiful DIY No Sew Outdoor Tassel Pillows for a little money. I love a good frugal project.
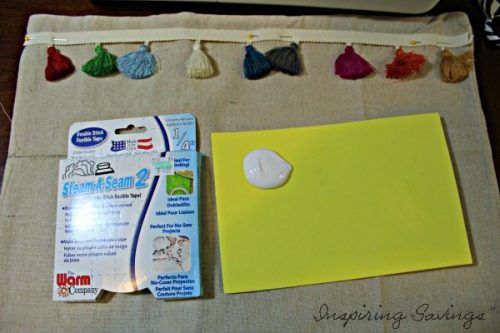
Items Needed
- Pillow Covers – I used 18×18. If you wanted to, you could easily make these yourself too!
- Pom Pom Trim – You can use multi-colored or solid colors to match a particular color theme. I used 2 yards of Pom Pom Trim for the pillow shown. You can use more or less based on how many you want on the pillow. I used these Rainbow C Pom Pom Ball Fringe Trim Ribbon Sewing(5 Yards) and Rainbow Pom Pom Ball Fringe Trim Ribbon Sewing(5 Yards).
- Tassel Trim – I used 3 yards of trim on this pillow.
- Pillow form or Poly-fill -If you want to stuff it yourself
- Sealant – This is optional but recommended. especially If your pillows will be outside.
This is a no-sew project! There are several ways you can attach the fabric. All three work well, so it is based on your preference! You can choose between the following options below:
- Steam a Seam (This is like an adhesive ‘tape’ that you iron on and it adheres.)
- Fabric Glue
- Hot Glue
Instructions To Make Your No-Sew Outdoor Tassel Pillows
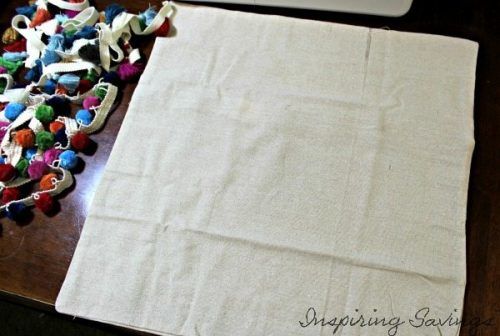
Before you begin, you will want to wash and dry your pillow cover as instructed.
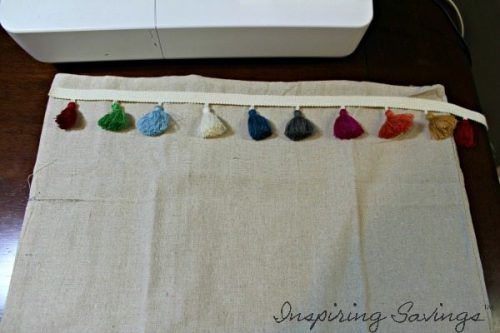
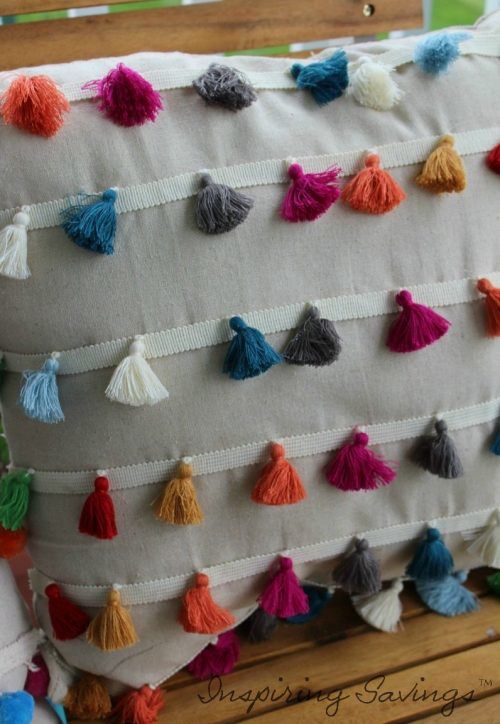
Now, begin to lay your pillow cover flat and measure out all your trims. Cut to your desired length. Two yards gave me four rows, and three yards gave me six.
How much you decide to put on your No-Sew Tassel Pillows is all about personal preference! I went with six.
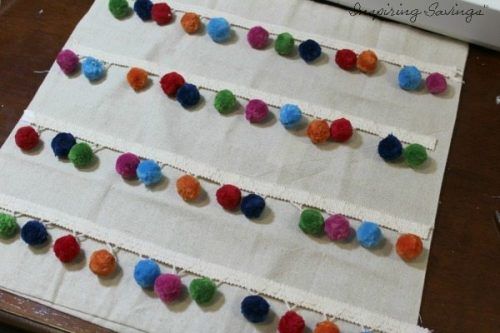
Next, arrange your rows of trim on your pillow cover. You will want to leave a few inches between the top of your pillow and your first row, as well as a few inches from the bottom of your pillow to the last row.

Using your choice of adhesive/glue, you can now attach your rows to the pillow form.
You can use Steam a Seam (just follow the package’s instructions) and your iron, or you can use glue. I did one pillow in fabric glue and another in hot glue. Both came out great!
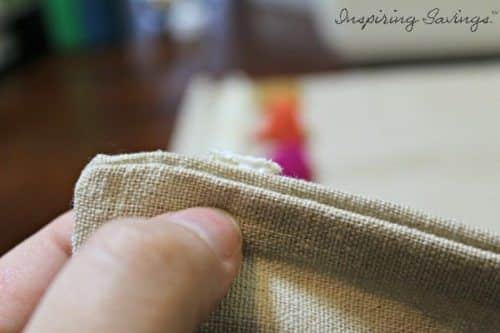
The edges of the trim will unravel a bit. I like to use liquid sealant on my edges, but if you are using glue, then you can always dab a bit of glue on the edges, and that will work too.
Let dry. Insert your pillow form or fill it with Poly-fil.
Update: Over the years, I have learned that having a waterproof insert makes all the difference with these No Sew Tassel Pillows. I have found one that I like and have switched from poly-fil to this waterproof resistant.
Other Frugal Craft Ideas
How to Make Frugal Plant Holders Out of Old Pans
Painted Rock Outdoor Tic Tac Toe Set
Easy Shower Jelly DIY Recipe – Get A Spa Experience At Home
This post may contain affiliate links or sponsored content. Disclosure Policy


What a wonderful idea to decorate pillows, so cheerful and colorful!
Thank you so much Diana!