
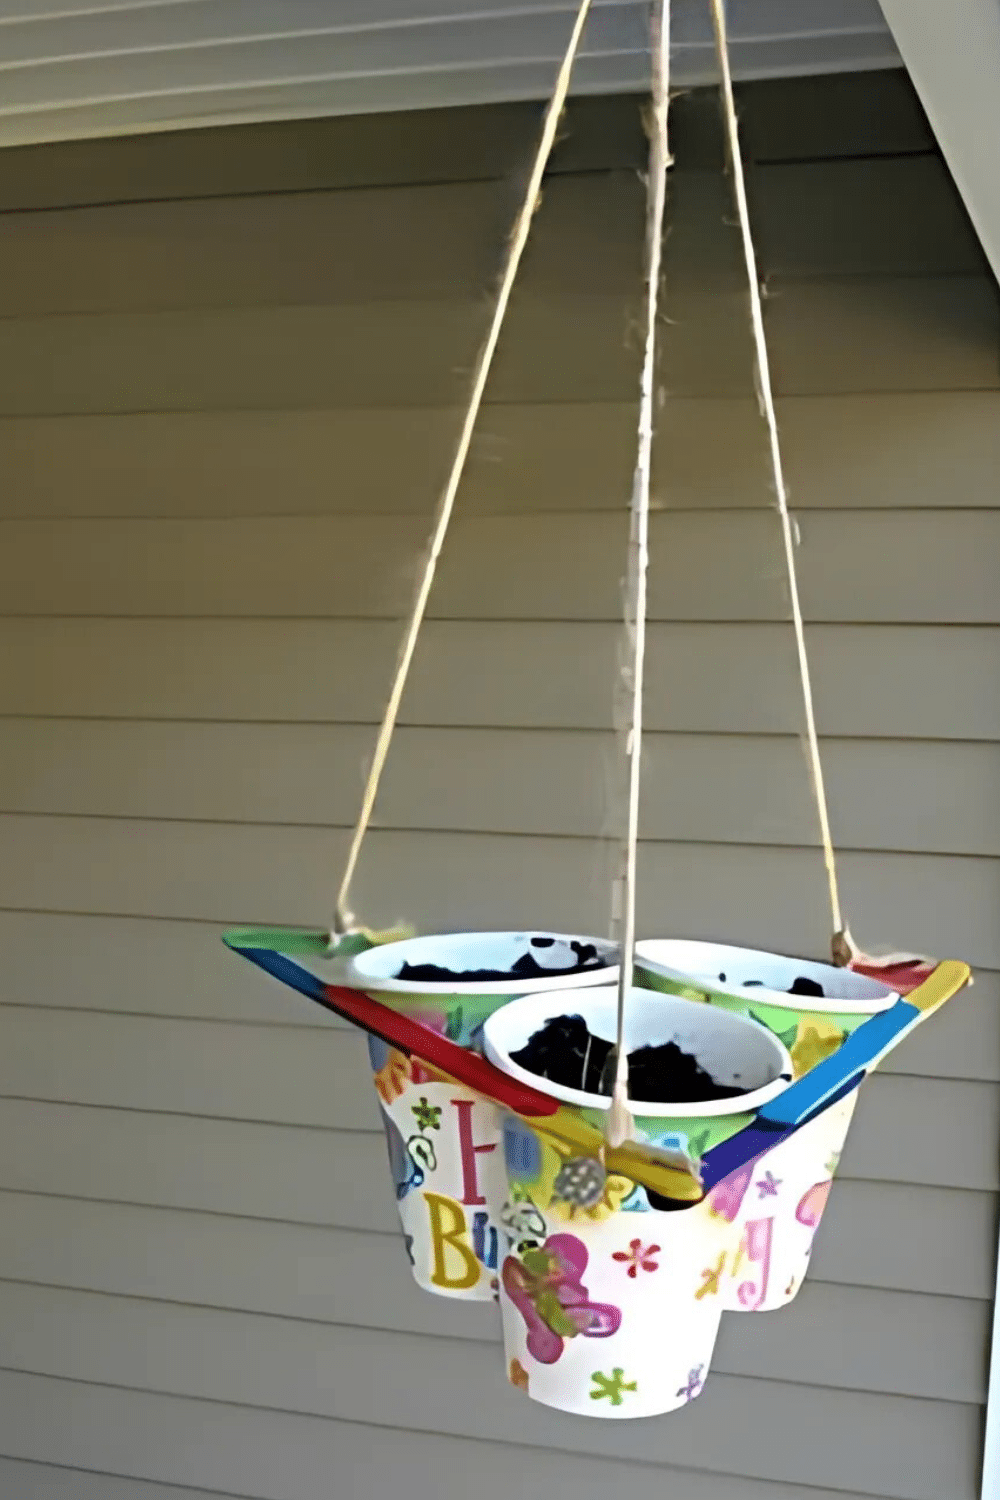
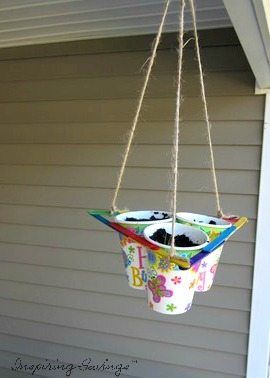
Paper Cup Hanging Seedling Planter
This ingenious planter, made from paper drinking cups, is a fascinating science project, a lovely hanging planter, and a clever space-saver all in one. It brings seedlings closer to the sun and your family even closer to springtime!
Paper Cup Hanging Seedling Planter
Don’t you just love doing fun projects with your kids? I DO!! I felt the need to get CRAFTY today.
It must have been that wonderful springtime weather. Starting seeds doesn’t need to be expensive. This project is easy, good for the earth, and it’s a great way to get kids involved in gardening!
It’s a great idea to start your plants from seed, you can save some big bucks and not to mention the bigger variety of seeds that are available. The best part is that you are creating significant memories with your kids. Enjoy and have fun.
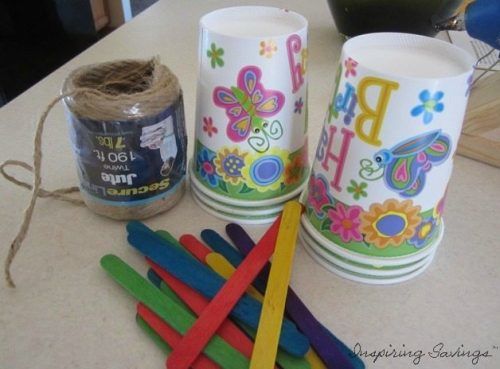
Material Needed For Paper Cup Hanging Seedling Planter
Ignore the “Happy Birthday” Written on the Cups. They look Spring-like & really for my kids, they didn’t care.
- 3 Paper Cups
- Stapler
- Scissors
- Popsicle sticks (roughly 9)
- Twine or thick yarn
- Glue (wood, Elmers or whatever you have on hand) I used hot glue (love the gun)
- Potting Soil
How to Make Your Paper Cup Hanging Seedling Planter
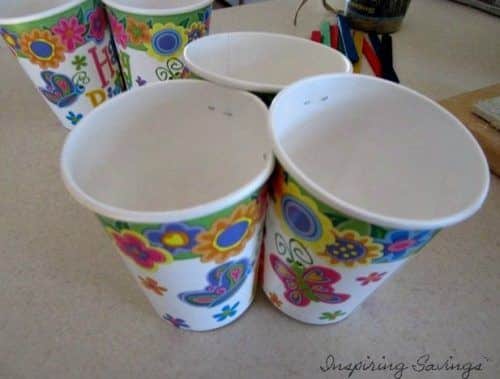
STEP ONE: First, you are going to need to secure each up to stabilize them for hanging.
Staple the three cups together (after decorating). Pictured below is using one staple b per cup, but I suggest adding in quite a few more. You want to make sure that the cups can hold your soil.
STEP TWO: Next, glue your popsicle sticks together to form a triangle that fits around the rim of the cups. You are going to need to overlap all your popsicle sticks.
I pulled out my trusty hot glue gun for this step to secure them in place. This step should not involve little fingers.
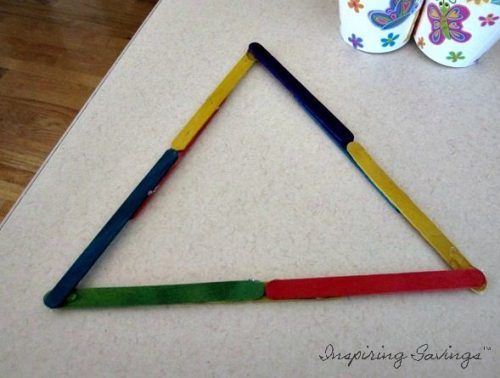
The key is overlapping your popsicle sticks to make the triangle. Like the image above.
STEP THREE: Cut three 18″ pieces of twine or heavy yarn (I believe ours was slightly longer than the 18 inches).
STEP FOUR: Then you will tie each piece of yarn to a corner of your triangle. After that, tie the three pieces together at the top. Do your absolute best knot.
STEP FIVE: Fill the cups with soil, plant some seeds (according to your seed pack instructions), and hang your beautiful planter near a window. I do suggest using potting soil if you have it. It is lighter, but if you don’t any old soil will work. Just make sure it is not too heavy.
This craft is not made of industrial-type strength. If you know what I mean? Spritz with water several times a day.

Don’t forget to keep your soil moist. It makes your seeds happy. To do this, just fill a container with some potting soil and wet it through.
Be careful not to make it soggy. Your planters are made out of paper cups and too much water can actually weigh down the soil and allow the paper in the cups to absorb the water. You may then end up with a hole at the bottom. You don’t want that.
If you’re planting more than one type of seed, you can simply mark the outside of the cups with a sharpie marker after filling them with soil.
Other Fun & Frugal Craft Ideas
Fun Birthday Party Game – Painted Rock Outdoor Tic Tac Toe Set
How to Make Frugal Plant Holders Out of Old Pans!
DIY No Sew Outdoor Tassel Pillows – 6 Step Project
This post may contain affiliate links or sponsored content. Disclosure Policy


One Comment